|
Glass Tips & TricksNewsletters from our past converted to fresh articles about stained glass.
|

|
Setting Up A Sandblast System
In this article I show steps to setting up out sandblast cabinet. This is one of the large models sold by Harbor Freight. After completing the setup and running the cabinet for a time, I elected to remove the pressure pot so that I could go back to the gun that uses venturi suction to pick up the sand. It's not as efficient, but I find I can control the sand much easier with the gun rather than with the heavy hose that the pressure pot requires. All the other setups in this article remain the same.
Our first sandblast cabinet was set up to use a siphon system to deliver the sand. That method uses much more compressed air, so you need a bigger compressor, or you have to wait while your air catches up with the blaster.
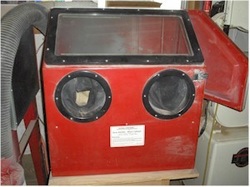
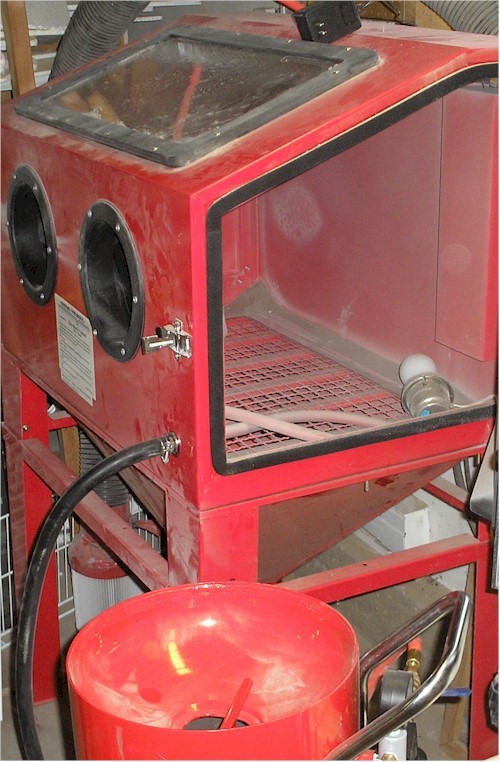
You can see that it has two protective gloves in the front of the cabinet and a door on the side to put the glass into the cabinet.
It works well and has served us for many years.
You can see that it has two protective gloves in the front of the cabinet and a door on the side to put the glass into the cabinet.
It works well and has served us for many years.

Air comes into the cabinet from the compressor through an orange air hose and then shoots out the gun nozzle. As it passes over the intake opening, it draws sand up through the gray hose, the air and sand are mixed and they go together out the nozzle.
It takes more air to move the sand with this method, so that's why we're swapping to a different system. The gray hose has a pipe on the end of it that extends down into the cabinet in a pile of sand. (I reverted to this method because I had better control)
It takes more air to move the sand with this method, so that's why we're swapping to a different system. The gray hose has a pipe on the end of it that extends down into the cabinet in a pile of sand. (I reverted to this method because I had better control)
You've got to have a way that air can get out of the cabinet, otherwise when you pull the trigger on the gun, a blast of air would come out until pressure built up in the cabinet and then it would slow down. It's like the difference between blowing into a balloon or blowing through a straw.
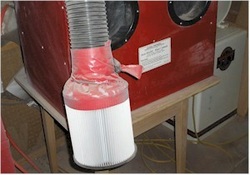
We solve that problem by exhausting through a filter hooked to the back of the cabinet. You can use a filter, a vacuum system or cyclone system. Just make sure that it doesn't let sand escape into where you might breath it.
We solve that problem by exhausting through a filter hooked to the back of the cabinet. You can use a filter, a vacuum system or cyclone system. Just make sure that it doesn't let sand escape into where you might breath it.
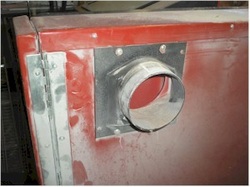
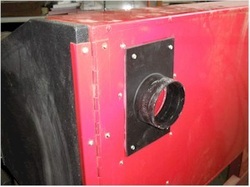
There were two modifications needed for this cabinet. I needed a sealed outlet for the dust collection and one for the air inlet.
I added a sealed flange for the air system and I'll show how to do that a little later.
I added a sealed flange for the air system and I'll show how to do that a little later.
Once the flange was in place, I put the hose to the filter on and held it in place with a dryer vent hose clamp.
To get air into the cabinet, I found that the threaded end of the hose slipped through a pre-drilled hole in the cabinet. I also found that a quick connect would thread right onto the hose end. But it didn't tighten up enough, so I added washers to the inside and outside of the cabinet, applied silicon on both sides of the washers, tightened everything down and I had a perfect seal.
Then I could add an in-line water removal device. And sometimes I had a pressure regulator at this point as well.
And then quick connected the air line from the compressor to the cabinet.
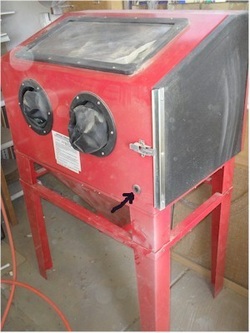
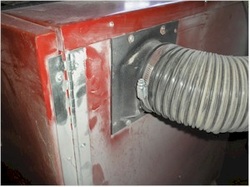
Our new sandblast cabinet is larger and has a more detailed setup. It only needs a sandblaster hose input (which will go where the arrow is pointing) and a vent flange like the one on the other cabinet.
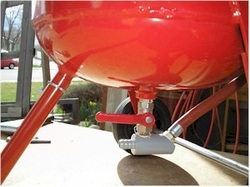
This cabinet has it's own legs, so it won't sit on a table and the sand gets blown in from an outside pressurized source. It has to be emptied occasionally from a chute that opens on the bottom of the cabinet.
This cabinet has it's own legs, so it won't sit on a table and the sand gets blown in from an outside pressurized source. It has to be emptied occasionally from a chute that opens on the bottom of the cabinet.
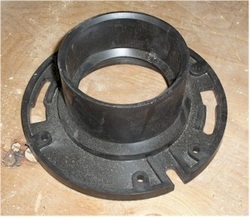
I could have used a plumbers toilet flange to run my vent hose.
But I had an old plate from an old vacuum system which I cut down.

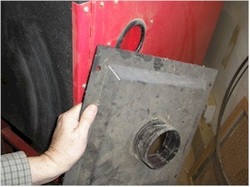
Then I drilled holes to attach the plate to the cabinet.
I marked where the holes were onto the cabinet and drilled pilot holes for self tapping screws.
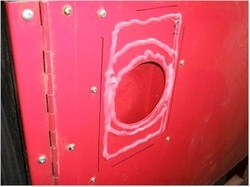
Then I removed the gasket that was inside the 4" hole so the flange would sit flush on the cabinet and I put clear silicone on it so it would have a good seal and bond well to the flange.
Screws went in and the flange was in place.
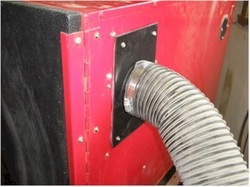
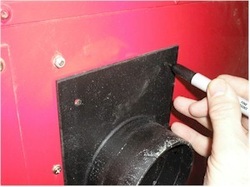
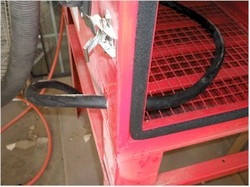
Next, the vent hose to the filter was attached using a dryer vent hose clamp. This is a spot where you want a good seal to avoid abrasive leaking out into the room.

The cabinet is a great way to protect you from sand and abrasives while creating beautiful art pieces. Now much of the following is about setting up the pressure pot, which I have given up..but will be good information if you set one up and there are instructions that apply to both types of setup.
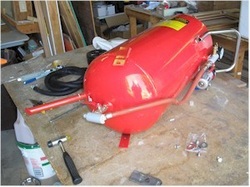
The pressure pot component of a sandblast system requires some assembly.
I lay it out on a workbench for easy access as I put air fittings, wheels and hoses on the pressure pot.
I lay it out on a workbench for easy access as I put air fittings, wheels and hoses on the pressure pot.
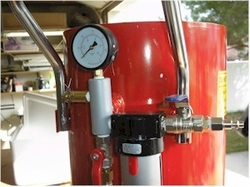
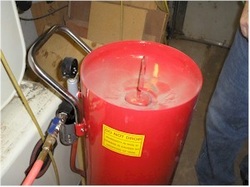
Air will enter the tank from an air hose at the quick connect on the right. You can see the blue handled on/off valve that allows the air to be stopped, then air goes through a filter which gets rid of excess moisture and into the splitter (with a gauge on top). The splitter lets air go into the top of the tank to pressurize the sand in the tank or to go down to the bottom of the tank to pull sand and air to the blast cabinet.
On the bottom is an on/off valve to let sand into the air line or not. It's important that when you operate your system that this valve be entirely on or completely closed. If you only open it halfway, sand would eat away at the valve and ruin it in short time.
The bottom feed hose isn't yet attached to the pot.
The bottom feed hose isn't yet attached to the pot.
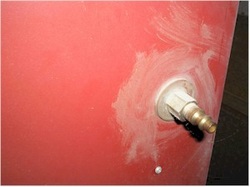
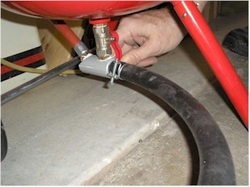
I removed the grommet from the front of the cabinet and pushed the feed hose through. This is only a temporary solution. I get ready to seal the hose with tape inside and out.
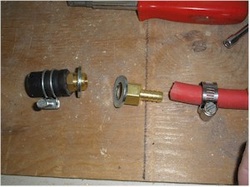
On further thought, I'm not happy with poking the hose through the cabinet. I want something that will be more reliable. I go to the hardware store and find these fittings. From left to right, the piece of hose and holding ring I cut off earlier with the hose fitting, a washer on the fitting to seal the opening, another washer against a different hose fitting, a smaller more flexible hose and a hose clamp.
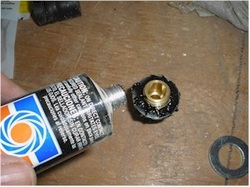
I add some black silicone to the washers before putting them on the cabinet.
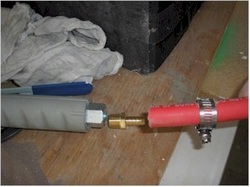
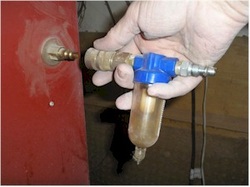
The other end of the hose will get a brass fitting and the blast gun.
Here is a view inside the cabinet, threaded fittings and washers in place with a hose that will allow the sand/air mixture into the cabinet and up through the blast gun.
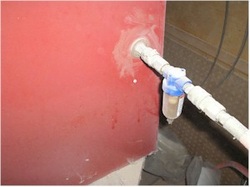
Once the hose is attached from the bottom of the sand pot to the front of the cabinet, we're ready for abrasive.
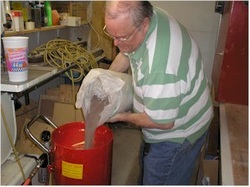
I pour a few pounds into the top of the pot. This is aluminum oxide. I prefer to use it instead of sand, if you accidentally breath sand, over time it can cause silicosis, a buildup of silica in the lungs.
I pour a few pounds into the top of the pot. This is aluminum oxide. I prefer to use it instead of sand, if you accidentally breath sand, over time it can cause silicosis, a buildup of silica in the lungs.
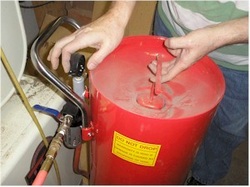
I pull the handle up to seal air in the pressure pot as I reach to turn the air on to the pot.
The sealed pot takes some time to fill up with air and reach the pressure of the system.
Then I open the sand flow valve on the bottom of the tank. It must be opened all the way or abrasive will wear away the valve mechanism inside.

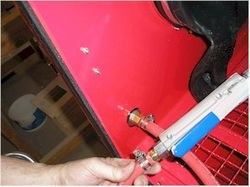
With my hands in the rubberized cabinet gloves and the side door sealed shut, I blast the pieces in the cabinet. It takes a hard grip to open the valve but the amount of sand being blasted is a considerably larger volume than the last cabinet.
I ran a bare bulb on a cord into the cabinet for light, the supplied light that came with the cabinet doesn't work.
I ran a bare bulb on a cord into the cabinet for light, the supplied light that came with the cabinet doesn't work.
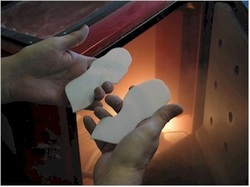
The finished pieces turned out very well.
When I'm done, I turn off the sand flow valve on the bottom of the pressure pot, cut off the air inflow valve and blast the extra sand out of the hose into the cabinet until the pressure in the pot is released and the pot seal handle drops.
When I'm done, I turn off the sand flow valve on the bottom of the pressure pot, cut off the air inflow valve and blast the extra sand out of the hose into the cabinet until the pressure in the pot is released and the pot seal handle drops.
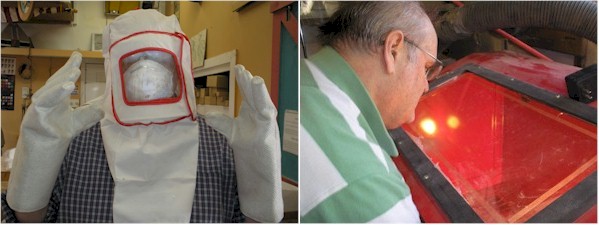
The difference between suiting up to sandblast and blasting in a cabinet is great. It's more comfortable, cleaner and easier to see what you're doing. I still have to suit up when glass pieces won't fit into the cabinet, but that's rare.
The cabinet is finished and I'm anxious to use it!
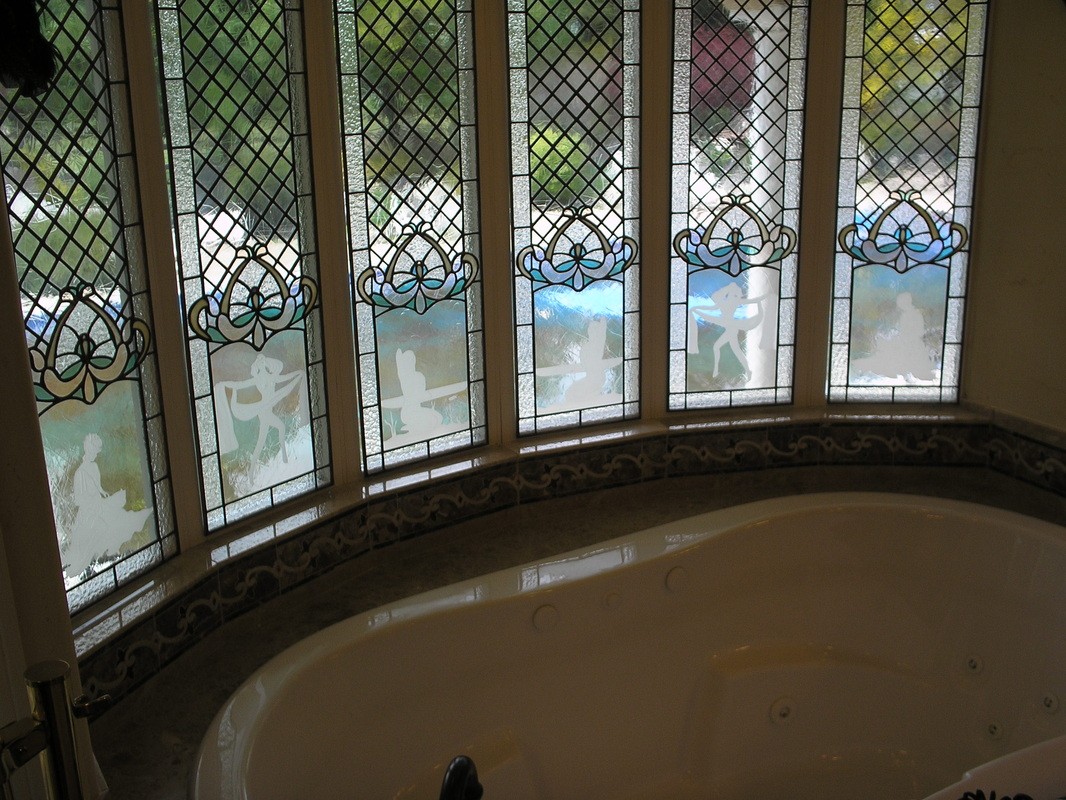
Now that i'm not using the pressure pot, the air still goes through that fitting that goes through the cabinet. I'm looking for an alternative so I can use the pressure pot, but for now the control I've got is pretty good. Check out the nudes we sandcarved for a collectors bathroom:
Now that i'm not using the pressure pot, the air still goes through that fitting that goes through the cabinet. I'm looking for an alternative so I can use the pressure pot, but for now the control I've got is pretty good. Check out the nudes we sandcarved for a collectors bathroom: