

|
Glass Tips & TricksNewsletters from our past converted to fresh articles about stained glass.
|

|
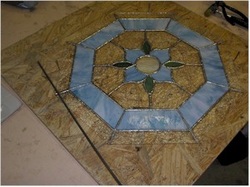
How To Put Metal Around An Octagon Shaped Panel
We sometimes find it useful to put 1/8" "U" zinc around a panel. It can be used as a permanent frame on panels where the gap between pieces of glass on the edge are less than 5" apart. One of the things we find 1/8" metal useful for is in strengthening a panel with a weak design that we have to ship off for someone else to install. The 1/8" zinc adds enough extra to keep the panel from "folding" up.
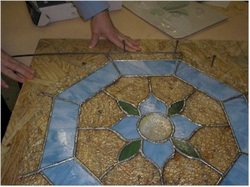
Start by laying the panel on a board.
Start by laying the panel on a board.
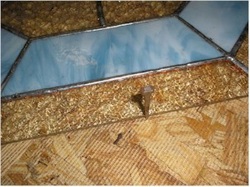
Then nail the panel in place using horseshoe nails in several places to keep the panel from slipping around.
If you're nailing near a raw edge of glass, use care not to chip it. You can use a piece of scrap zinc as a spacer to protect the glass.
If you're nailing near a raw edge of glass, use care not to chip it. You can use a piece of scrap zinc as a spacer to protect the glass.
Once the panel can't slide around, start nailing the zinc around the panel. Use several nails to hold the first edge firmly in place.
As you bend the metal around the frame, you'll be able to spin the board instead of having the long length of metal hitting everything.
As you bend the metal around the frame, you'll be able to spin the board instead of having the long length of metal hitting everything.
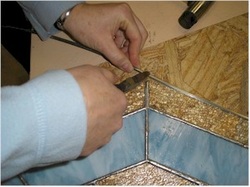
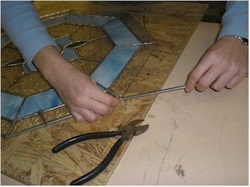
Then use diagonal cutters (sometimes called dykes or lead nippers) to clip the top and bottom of the zinc where you want it to bend.
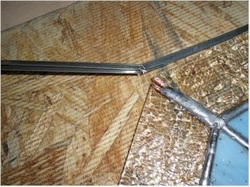
After clipping the top and bottom of the zinc, bend it backwards to allow the top and bottom to break. The back of the zinc should stay together as one piece and bend at the cut.
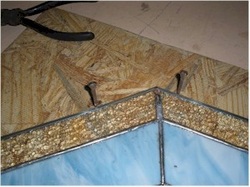
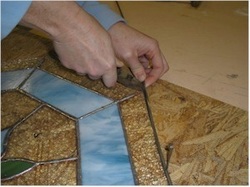
Then wrap the metal around the glass, placing a nail next to the metal to hold it in place.
Remember to hold the nail in such a way that if you miss with the hammer, you will hit your fingers and not the glass. Your fingers will stop hurting the the glass won't heal!
Remember to hold the nail in such a way that if you miss with the hammer, you will hit your fingers and not the glass. Your fingers will stop hurting the the glass won't heal!
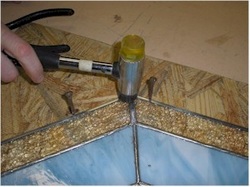
If the metal isn't fairly flat, gently tap the edges down.
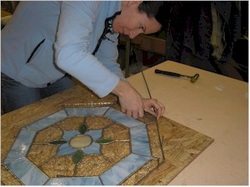
Here, our student, Stacey, practices clipping the metal.
She squeezes the dykes at both the top and bottom of the metal so it will easily break at the desired place.
She then bends the metal backwards so the top and bottom break loose, then she folds them in the direction she wants to go.
The metal corners usually just pass each other as they fold in place unless they didn't get cut right. If that happens, gentle tapping can usually get the metal in place.
She works all the way around the window.
The metal corners usually just pass each other as they fold in place unless they didn't get cut right. If that happens, gentle tapping can usually get the metal in place.
She works all the way around the window.
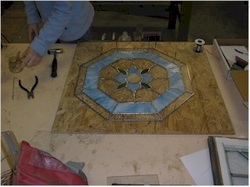
On the final piece, she bent the metal back and forth until the extra piece broke off.
Then she soldered the exposed copper foil at the edges, bring the solder onto the zinc so that each corner of the zinc was strong.
Then she soldered the exposed copper foil at the edges, bring the solder onto the zinc so that each corner of the zinc was strong.
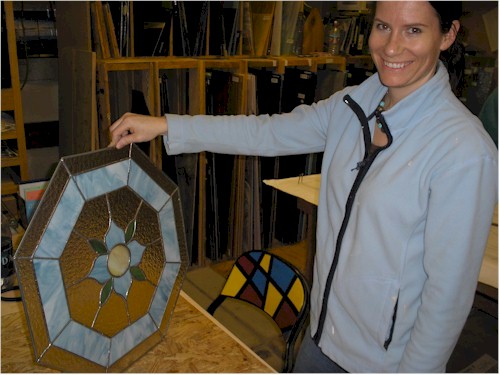
After soldering and cleaning, she has a beautiful piece she can be proud of.