Gomm Studios   (385) 392-7989
Gomm Stained Glass
  • Home
  • Projects
  • Classes
    • Learn More About Studio Classes
  • STORE & RESOURCES
    • Art 4 Sale
    • Amazon Shop
    • Etsy
    • Tips Articles >
      • Fixing Windows >
        • Repairing Severe Damage
        • Repairing A Broken Piece Of Glass
        • Fixing A Small Break In A Big Piece Of Glass
        • Faking A Repair
        • Doing A MAJOR Repair
        • How To Repair A Leaded Panel
        • How To Repair Stained Glass That Has Separated
        • How To Rebuild A Leaded Glass Window W/ Copper Foil
        • How To Repair A Moderately Broken Art Glass Panel
        • How To Repair An Insulated Stained Glass Window
        • Changing the Border Glass In a Leaded Panel
        • Repairing A Stained Glass Panel For An Artist
        • Repair Using A Dremel Tool
        • Quick(er) Lead Repair
      • Tricks Of The Trade >
        • Insulating Glass So It Can Be Hung In A Door
        • Moving And Handling Glass
        • Cutting Diamonds On Very Rough Glass
        • How To Add Coining To A Panel For A Very "French" Look
        • How To Shorten A Stained Glass Panel
        • How To Trim And Cut A Stained Glass Panel That's Too Long
        • How To Build A Jig To Help Cut Bevels
        • How To Cut Stained Glass Without A Pattern
      • Reinforcing and Framing Glass >
        • Reinforcing A Large Panel
        • How To Aggressively Reinforce A Window
        • Soldering A Zinc Edge On A Panel
        • How To Solder A Reinforcing Edge On A Curved Panel
        • How To Put Metal Around An Octagon Shaped Panel
        • Building A Frame For Stained Glass Shutters
      • Shipping Stained Glass >
        • How To Ship Big Stained Glass Panels
        • How To Build A Solid Shipping Crate
        • How We Crate Same Size Multiples of Glass
        • How To Build A "Double Foam" Crate
        • Loading Glass On A Trailer
      • Lighting Projects >
        • Installing Art Glass In A Pool Table Lamp
        • How To Build A Panel For A Backlit Space
        • How To Reinforce A Stained Glass Skylight
        • Creating A False Skylight
        • Building A Four Sided Lamp
        • Repair A Cheap Lamp Shade
        • Building A Stained Glass Lamp With A Worden Mold
      • Installing Stained Glass >
        • How To Install Stained Glass in an Existing Window Frame
        • How To Install Stained Glass In A Cabinet Door
        • How To Hang A Stained Glass Window
        • How We Install A Panel In An Arched Window Opening
        • What Ttype Of Caulk To Use
      • Sandblasting Stained Glass >
        • How To Sandblast Stained Glass
        • How We Sand Carve A Stained Glass Transom
        • Setting Up A Sandblast System
        • How To Sand Carve A Rose In Glass
      • Organizing Your Studio >
        • Build Your Own Work Bench
        • Chemicals We Use In Our Studio
        • Getting A New Glass Order
        • Build Your Own Stained Glass Rack
        • Converting To A Lead Free Studio
      • Bring New Life To Windows >
        • Removing Corrosion From Stained Glass
        • Re-Apply Patina To Stained Glass
        • How To Clean A Really Dirty Window
        • Clean And Apply Patina To Stained Glass
        • Cleaning And Adding Patina To A New Stained Glass Panel (revisited)
        • Easily Clean Corrosion Off Of Stained Glass
      • Unusual Projects >
        • Building A Stained Glass Globe
        • The Painted Leaf Project
        • How To Paint A Face On Stained Glass
        • Fusing A Stained Glass Necklace
        • Building A Stained Glass Picture Frame
        • Building A Stained Glass Jewelry Box
        • Make Stained Glass Charms
        • Repairing A Stained Glass Angel By Making Our Own Glass
      • Soldering Techniques >
        • Fix or Reinforce Glass With A Solder Bridge
        • How To Solder For A Stained Glass Repair
        • Reclaiming Old Flux Core Solder For Use In Stained Glass
        • Soldering Technique-Fixing A Foil Problem
      • Basic Skills >
        • How To Cut Stained Glass
        • How To Cut Stained Glass with a T-square Cutter
        • How To Cut A Tight Curve In Stained Glass
        • Cutting Very Thin, Irregular Stained Glass Pieces
        • Cut Glass Using A Straight Edge
      • Advanced Craftsmanship Skills >
        • Cut Glass Using A Taurus Ring Saw
        • Drill Holes In Stained Glass With Diamond Drillbit
        • Drill Holes In Stained Glass With A Grinder
      • Business Tips >
        • Marketing Stained Glass
        • Helping Your Stained Glass Business (And Yourself) Survive With Style
        • Mistakes Happen To Us All (And Then We Fix Them)
        • Converting To A Lead Free Studio
    • YouTube Videos
    • Free Patterns
  • About Us
    • Instagram
    • Shows And Galleries
    • History Of Our Studio
    • Articles About Us
    • Links
    • Contact Us
Picture

Glass Tips & Tricks 

Newsletters from our past converted to fresh articles about stained glass.
Picture

Building A Stained Glass Globe

We worked the whole year awhile back on planning for the candy windows that the Provo Arts Council sponsors each year at Christmas time. I was in charge of getting a globe for the moon in our display. I thought that would be easy enough, but it wasn't. I finally resorted to building two half round lamp shades and putting them together.
Picture
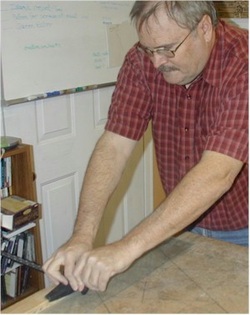
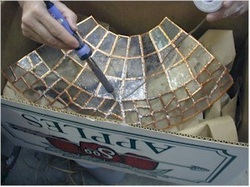
Since the globe is a free form piece with no laid out pattern pieces, I started with strips of glass, cut with a strip cutter. I knew that the final globe would be covered in candy and icing, so I didn't have to worry about the gaps and perfect solder job that most lamp projects require.


Picture
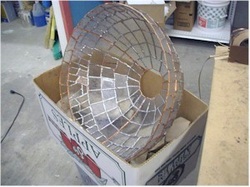
I prepared a "Worden" Styrofoam lamp base by laying tape over it to protect it. I added side pieces to constrain the pieces and I put horseshoe nails along the edge where I wanted the glass pieces to start.  


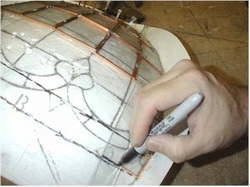
 Since the mold was round, I needed to lay strips on the mold and mark where they should probably go.


Picture
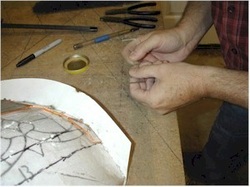
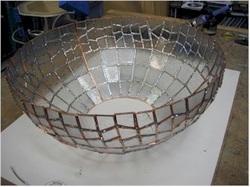
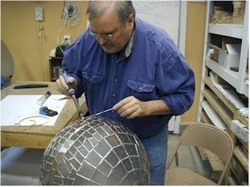
I started at the bottom of the mold and worked my way to the top, marking the glass, foiling it and tacking the pieces together, a row at a time. 

Picture
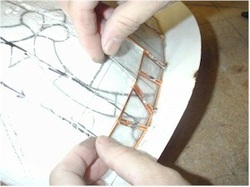
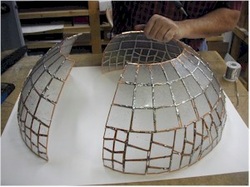
I laid up one row at a time, so they wouldn't fall off.

Picture
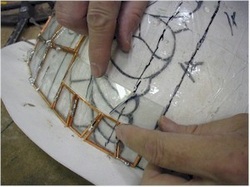
At the same time, I laid up a row of glass on the other side of the mold.

Picture
I foiled the row as soon as it was cut out.

Picture
I set the mold on the soldering table and soldered in much the same manner that we always work.

Picture
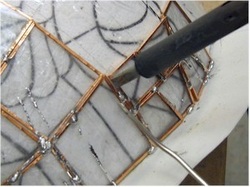
As I tacked the pieces together, gravity worked against me. But I didn't worry about drips at this stage of construction.

Picture
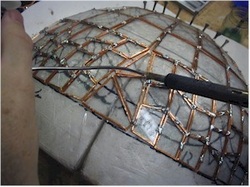
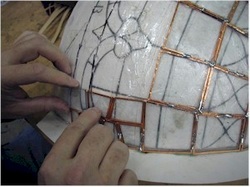
At the top, I selected a bigger piece of glass to fill in the final space.

Picture
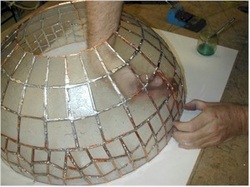
After the panel was tacked, I needed to solder the outside while still on the mold. I placed the mold in a box with crumpled paper to support things. I also used a garbage can to raise the box and the piece up to a comfortable height. 


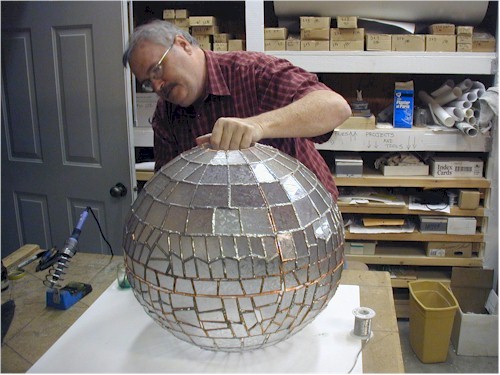
The key to success in soldering 3D pieces is to keep the line you're soldering level. So I rotate the globe with each line I solder so that it is level. This way the melted solder stays in place just like when soldering a flat piece and it doesn't try to run off of the project.

Picture
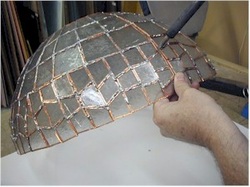
After the outside of the panel was complete, I gently removed it from the mold.

Picture
Then I placed the panel into the box full of crumpled newspaper for soldering. It's very important to solder along the most flat line possible, so placing the glass on paper allows me to shift and balance the panel for successful soldering.

Picture
That was easy, then I just had to build five more panels. Once they were done I began to tack the three top panels together.

Picture
I had to pinch the gaps together.

Picture
I also had to be careful not to let hot solder drip on me as I held things together.

Picture
Then, it was back to the box to solder the inside connections. It would be difficult to solder them after the globe was finished.

Picture
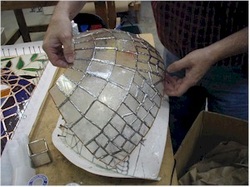
I then placed the top half of the globe on the table, ready to align the bottom half of the globe to it.

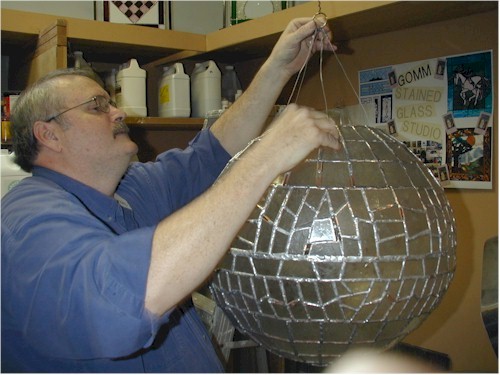
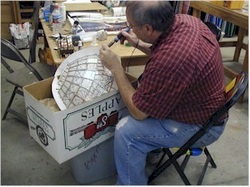
Finally, the globe is ready for final assembly. I place the two halves together to test for alignment.
Picture
Picture
Before I can solder the two halves together, I need to attach the wires which we will hang the globe from. Later I'll solder a rib of copper wire around the opening to add a little more strength so that there will be less stress on the glass as the globe hangs.

Picture
I have to add foil around the gap that runs around the "equator" of the globe. Then I solder around it, sealing the gap. I also solder all the areas that haven't yet been soldered on the outside of the globe.

Picture
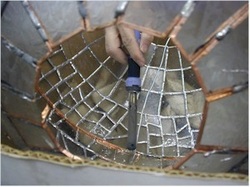
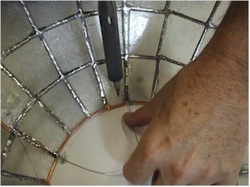
I have to reach a long way to solder on the inside of the globe. After that I add a piece of glass which closes the bottom of the globe and allows for a nice flat surface for the globe to rest as other work is done to it.

Picture
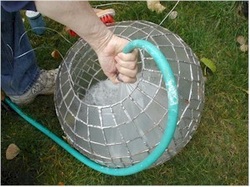
I then cleaned it well with cleanser and brush and hosed it out.

The last thing to do is attach the wires on the completed globe to the ring which it will hang by. 
Picture

Home

​
Stained Glass Books
​

Stained Glass Videos

​Links Page

Stained Glass
Art Therapy

​Studio Classes

OnLine Classes

​Portfolio

​Etsy Patterns

​UCAB Sourcebook

Build Your Own Table

Kaleidoscope


Tips & Articles

Patterns
Mosaic Patterns

​Contact Us

Art For Sale

​Free Videos

Creativity Quotes
​

Date Night
​
​
History Of Our Studio

​Articles About Us

​Shows And Galleries

​Join Our Email List

5 Ways To Thrive
​​

Copyright © 2016-2025