

|
Glass Tips & TricksNewsletters from our past converted to fresh articles about stained glass.
|

|
Building A Stained Glass Lamp With A Worden Mold
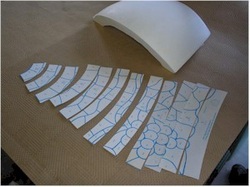
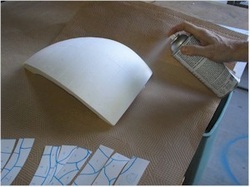
There are two parts to the Worden system of lamp molds. One is the rigid Styrofoam form and the other is the pattern pieces and magic strips that guide you as you build the shade.
By dividing the pattern and the mold apart, stores can carry all their product line without taking up too much space.
By dividing the pattern and the mold apart, stores can carry all their product line without taking up too much space.
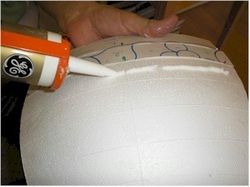
I first used silicone caulking to glue the magic strips to the mold. The caulking didn't cure, so after two or three days, I peeled them off and carefully scrubbed them with a small amount of water to get the bad silicone off the strips. Then I placed a heavy book on them as they dried so they wouldn't warp.
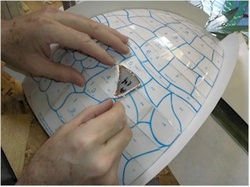
As you prepare to do a lampshade, you won't have to make the same mistake I did. You can start by lining up the cut out magic strips on paper to contain your mess.
Then spray a moderate layer of glue just on the part of the mold marked for the first magic strip.
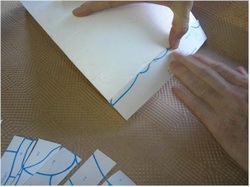
Then press the magic strip in place. You'll find that if you use care and patience, smoothing the strip over and over, it will begin to stick well.
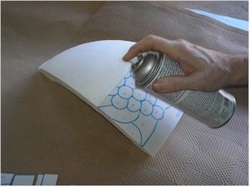
Work your way up the mold, spraying and applying each strip one at a time.
Pay attention to how the strips line up with each other as well as the guide markings on the mold.
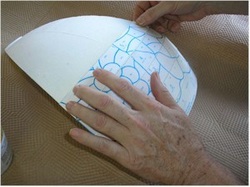
After all the strips are in place, you may want to apply wide, clear tape to the entire surface, to further hold the strips down and to provide some small protection for the mold, from dripping solder and flux.
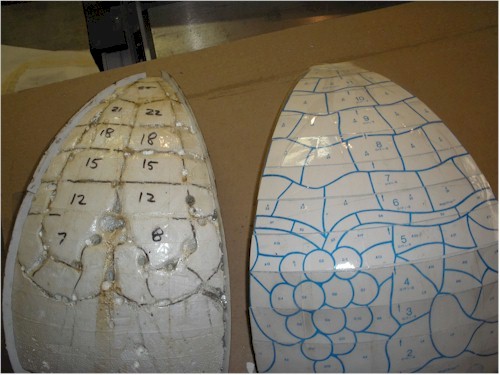
Above are two molds. The one on the right is the mold we've been working with, covered in tape to protect it. The one on the left has been used and not prepared or protected. There are many holes melted right through the mold from solder drips.
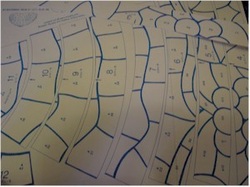
We finished cutting out the pattern pieces at the end of last months newsletter.
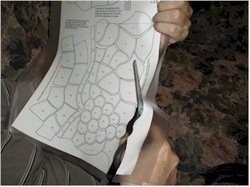
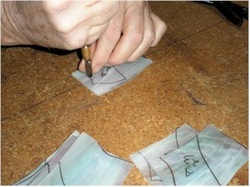
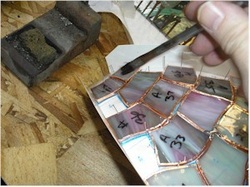
We're building 2 lamp shades, each has six lamp sections, which means that we need to cut out 12 of each piece of glass. Jeanne uses a ruler to help in laying out the pieces, we can't afford to waste any glass.
We choose to do two colors in the field of the lamp shade. A lighter tone at the bottom and darker at the top. The lighter glass took up an entire sheet of glass.
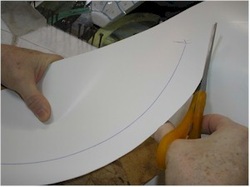
So, we get to the cutting.
This is my favorite part, but hundreds of pieces later, I'm pretty worn out and we still haven't cut them all!
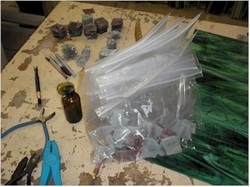
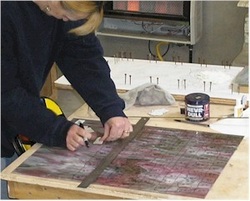
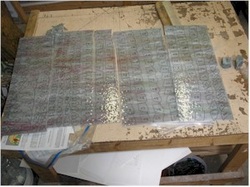
As a way to organize, as we grind the pieces, they get sorted into 12 bags so that we can work with one set at a time.
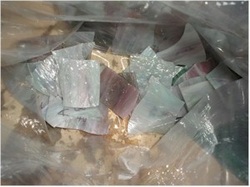
Here is the inside of a bag of parts. When drying the glass, the numbers often came off and we had to rewrite them.
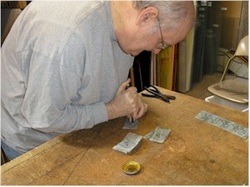
Our friend and student, Sarah, has been helping with the grinding and foiling.
Our friend and student, Sarah, has been helping with the grinding and foiling.
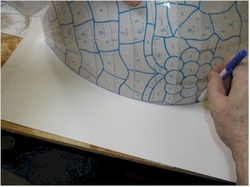
Next, we take the mold and trace it's edge so a pattern board can be prepared to keep the glass pieces on the edges of the mold.
I cut them out.
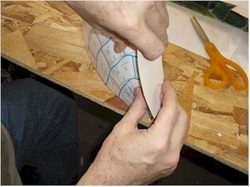
And pin them to the edges of the mold.
Then the job of placing the glass onto the mold began.
The job is time consuming and quite enjoyable.
I place pins around the glass but avoiding joints so that I won't solder the pins in.
As the pieces get put in place I have to balance the pieces so that they line up with each other. The connection pieces are left out till the panels are all tacked together.
It's a long process to build lampshades. I love the process, it's such a beautiful result when complete. I started building these lampshades in January, and completed in April in between working on other projects. This newsletter didn't get sent out in March when it was due because I didn't have all the pictures to go with it. What a joy it is to craft the panels.
It's a long process to build lampshades. I love the process, it's such a beautiful result when complete. I started building these lampshades in January, and completed in April in between working on other projects. This newsletter didn't get sent out in March when it was due because I didn't have all the pictures to go with it. What a joy it is to craft the panels.

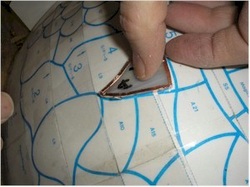
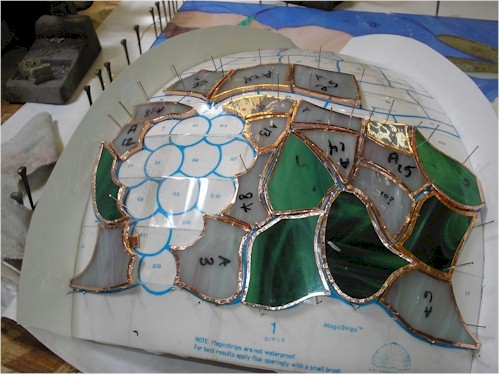
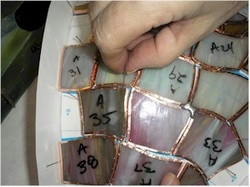
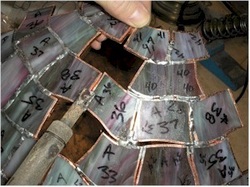
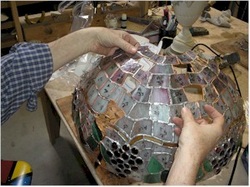
Now, with the mold prepared and the pieces cut and foiled, they can be set out on the mold.
First a row of pins is set out on each end of the mold. Pieces are set in place and pins are pushed in to keep pieces aligned.
First a row of pins is set out on each end of the mold. Pieces are set in place and pins are pushed in to keep pieces aligned.
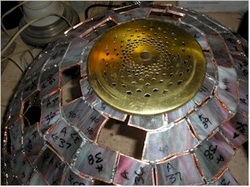
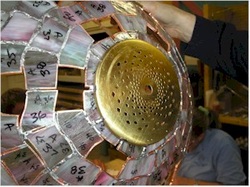
A view of the edge shows the many pins needed to hold the pieces in place.
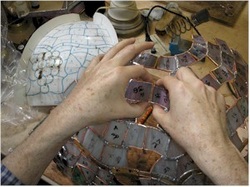
Since the pieces are flat and the mold is rounded, they must be held so that they are at angle to the other pieces, achieving as close to rounded as possible.
Since the pieces are flat and the mold is rounded, they must be held so that they are at angle to the other pieces, achieving as close to rounded as possible.

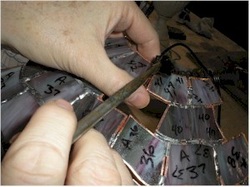
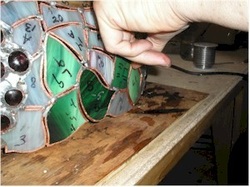
The first panel, is held by pins to insure that each of the pieces fit.
After they are all fitted in the first panel, subsequent panels just get the pieces set in place and then tack soldered. This saves a great deal of time and pain from pushing pins into the mold.
After they are all fitted in the first panel, subsequent panels just get the pieces set in place and then tack soldered. This saves a great deal of time and pain from pushing pins into the mold.
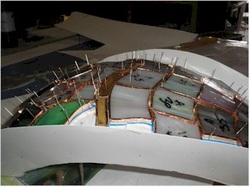
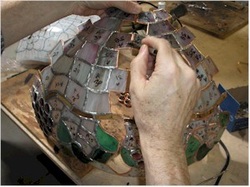
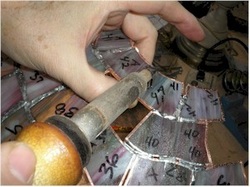
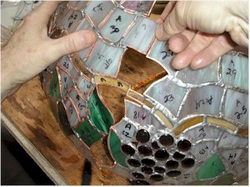
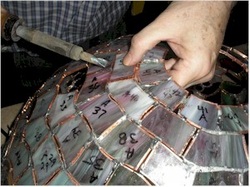
With them all in place, they get tacked together.
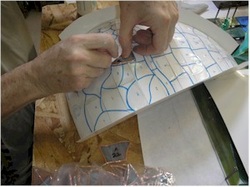
The flux is added, gravity works to cause the flux and melted solder to run downhill so care must be taken not to make a mess.
Care must be taken not to solder the pins onto the lamp panel.
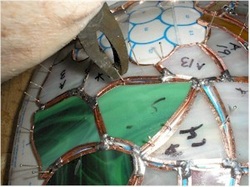
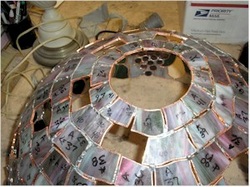
After tack soldering, the pins get pulled out. The pins at the top and bottom are left in place because they'll be needed as the other panels are constructed.
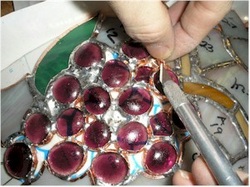
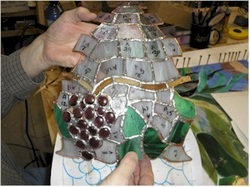
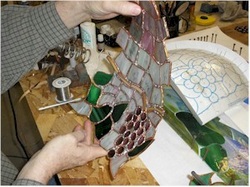
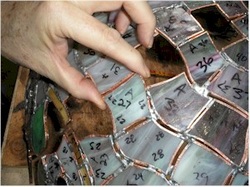
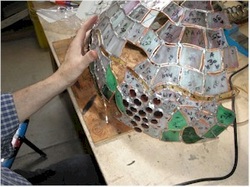
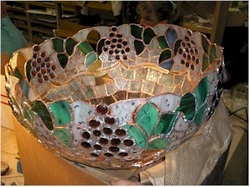
Pieces of foil are used to fill gaps in the grape section so as to avoid melting the lamp mold with hot solder.
We used glass globs to create our grapes. I think next time I build a shade, I'll cut the glass pieces out so that we get a tighter fit.
We used glass globs to create our grapes. I think next time I build a shade, I'll cut the glass pieces out so that we get a tighter fit.
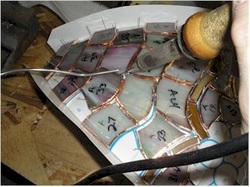
Once the panel was tacked, I soldered it on the outside, leaving the inside untouched so it would be more flexible.
When I got a second panel soldered and did a test fit, I found that they weren't as flexible as I like, so the rest of the panels were only tacked.
When I got a second panel soldered and did a test fit, I found that they weren't as flexible as I like, so the rest of the panels were only tacked.
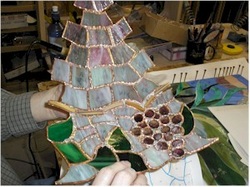
Here's the completed panel, ready to be assembled into the complete shade.
The panel is curved and slips easily off of the lamp panel.

Then the panel is laid in a box full of crumbled paper which supports it.
The assembly process begins once the 6 panels are tacked together. When lining up the first two panels, I line up the top and then a little farther down.
Once I get the lower piece lined up, I tack solder it in place.
Then I move up to the top and line those pieces up.
Then as I move down the shade, I carefully and gently bend each side to meet each other.
When they are lined up, I tack them together and then move on.
When I can't get both pieces lined up, I line them up so that they are as close as I can get them.
In any shade, there are many places where pieces don't line up perfectly. As the lamp shade is built, it's normal to have imperfections since the flat pieces are laid out on a round surface.
In any shade, there are many places where pieces don't line up perfectly. As the lamp shade is built, it's normal to have imperfections since the flat pieces are laid out on a round surface.
When I begin to line up the third panel, I squeeze and prod the panels to get them into place.
Just as before, I tack solder the pieces when I get them lined up.
Sometimes the entire panel needs to be bent, sometimes the pieces just need to adjusted.
When the entire piece begins to feel a little wobbly, I add an extra piece to give the entire shade more support.
As the sixth panel is put in place, the tacked in piece gets attached along one side first. If you look carefully at the other edge you can see that it hasn't been aligned yet.
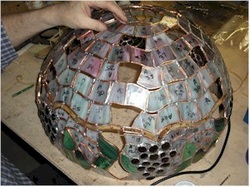
When all 6 panels are tacked, I begin to tack in the pieces that were left out because they overlapped.
The tacked lampshade in very wobbly still and it remains so until the heat cap gets soldered in place.
I have to use care when moving the shade. By this time it is so heavy that pulling the shade carelessly will tear the copper foil.
The tacked lampshade in very wobbly still and it remains so until the heat cap gets soldered in place.
I have to use care when moving the shade. By this time it is so heavy that pulling the shade carelessly will tear the copper foil.
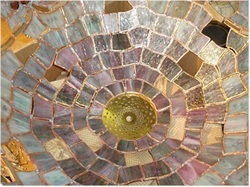
Once the heat cap is ready, I inspect the lamp shade and insure that the opening is round.
The heat cap has to be soldered to the top of the lamp shade. I can't put the shade up to check for balance yet, so I have to center cap visually.
When the cap is tacked in place, I was able to pick up the shade and turn it over. Since it's just tacked I have to be very careful.
When I place it into a box with paper for support, I can arrange to place more pieces into the shade.
As I began to work on the shade, it began to deform out of round. The box edges push too much on the sides. So I picked it up right away and set it on the table.
It was easier to keep it round with the full support of the table.
It was easier to keep it round with the full support of the table.
Once I got the missing pieces soldered in, I needed to strengthen the shade since the outside edge was very weak and placing it in a box would deform it.
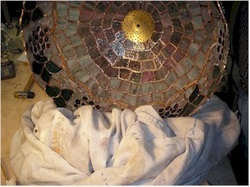
I solved the problem by gathering a drop cloth and using it to support the shade as I soldered it.
I solved the problem by gathering a drop cloth and using it to support the shade as I soldered it.
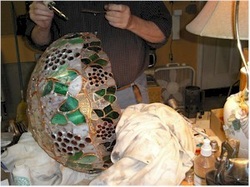
I stood to solder at this stage. I soldered the very outside edge first, the bottom 4 inches of the shade. As I finished the space where the lines were on top, I would rotate the shade so the next couple of lines would be horizontal to the world.
I had to be careful when moving the base, it was easy to tear off an unsoldered piece of glass, so I picked up the shade from the outside bottom to rotate it.
I had to be careful when moving the base, it was easy to tear off an unsoldered piece of glass, so I picked up the shade from the outside bottom to rotate it.
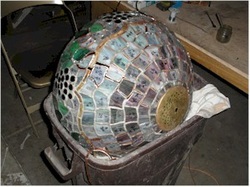
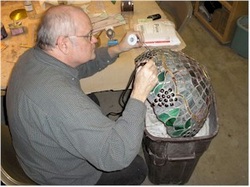
Once the outside ring at the bottom of the shade was soldered, it was strong enough to hold it's shape. I found that if I put the drop cloth in a trash can for additional support, it was the right size to support the shade as I finished soldering it.
It took many hours, way too many (see note below), to complete the soldering of the shade and I got it complete on the outside but not the inside in time for our show.
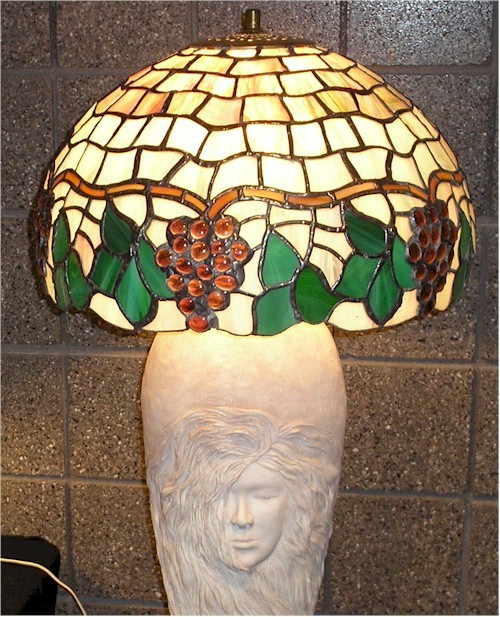
The nearly finished shade was an important piece in our 2011 show at the Covey center entitled "Illumination". The piece with the shade represents "The Goddess Of The Vineyard."
Note: I have learned from past mistakes in the stained glass business that if you stop work on a panel and then pick it up again, you create a lot of work for yourself. There have been times when we have gotten a rush order, dropped the current project, completed the rush and then started back on the order we pushed aside. We have learned that it always takes so much more time to get back into the rhythm of the work (remembering what we'd done, what the colors were, etc.) that we would have been better off if we would have finished the work when the rush came and spent more time after-hours on the rush rather than dropping the original work.
This was particularly true with this shade which we worked on in our spare time over the course of a year. I tacked the panels together and assembled them, ran out of solder and didn't get back to the lamp shade for several months. The shade was left, un-cleaned for those months and when I went back to the finish soldering, I was dismayed to find that the time to finish the soldering was easily seven or eight times what it would have been if I had finished it all at once. I had to really work the old solder to get the new stuff to stick and the resulting lines were okay but not as perfect as they would have been had I done it all at once.
This was particularly true with this shade which we worked on in our spare time over the course of a year. I tacked the panels together and assembled them, ran out of solder and didn't get back to the lamp shade for several months. The shade was left, un-cleaned for those months and when I went back to the finish soldering, I was dismayed to find that the time to finish the soldering was easily seven or eight times what it would have been if I had finished it all at once. I had to really work the old solder to get the new stuff to stick and the resulting lines were okay but not as perfect as they would have been had I done it all at once.