

|
Glass Tips & TricksNewsletters from our past converted to fresh articles about stained glass.
|

|
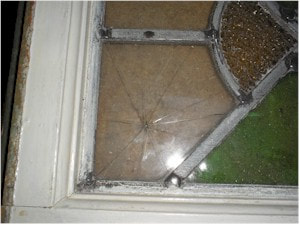
We don't love to do leaded glass repairs, but a friend had a piece that had been shattered so we agreed to fix it. Because it would be so much work to remove it from the frame and disassemble the lead to do the repair in the traditional method, we decided to do the repair using a less standard way.
We couldn't have done it this way if the lead in the window wasn't in very good shape.
We couldn't have done it this way if the lead in the window wasn't in very good shape.
To repair a leaded glass window in the least expensive manner (The copper foil method doesn't require the whole panel to be removed and disassembled). I started by taping the broken piece of glass so that I can use it later for a pattern.
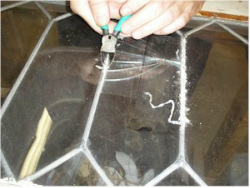
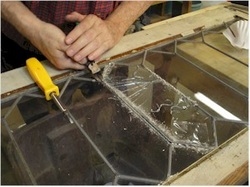
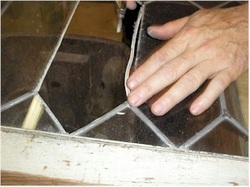
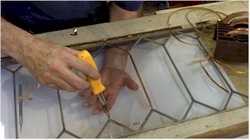
Then I got my sharpest pair of nippers and began cutting the top surface of lead away in enough places to free up the broken glass.
Then I got my sharpest pair of nippers and began cutting the top surface of lead away in enough places to free up the broken glass.
I have to use care so that I don't shatter the glass below. If I'm careful, just the lead gets cut.
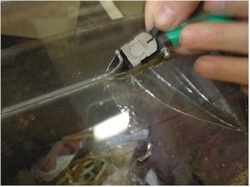
Once I have the lead out of the way, I use a screwdriver and a thin chisel to scrape away the cement that holds the glass in place.
I find that there are a few more places where the glass is held so I take out a little more lead.
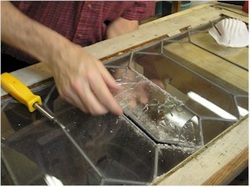
I can then gently remove the broken piece.
It takes a little wiggling to get it out.

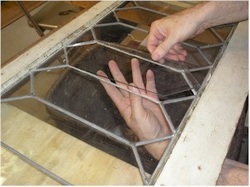
Once the piece is removed, I brush away the debris and let it fall into the garbage can just below the window.
I wear a mask when working with lead came to reduce my exposure to lead.
I wear a mask when working with lead came to reduce my exposure to lead.
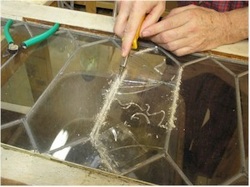
I use nippers to further remove lead on the top surface of the panel. Now that the glass is removed it's easier to clip along the heart of the lead without disturbing the lead on the back of the window.
I find that the long side pieces of lead are somewhat deformed and won't look good and won't be strong enough, so I clip them away.
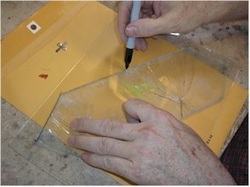
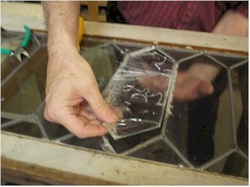
Now, I lay the broken piece onto the replacement glass and trace the shape out.
Then cut it with a hand cutter.
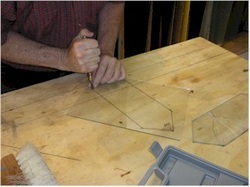
I test fit it, and grind where needed.
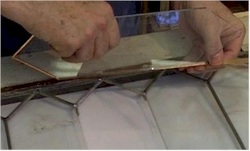
Then I can foil the entire replacement piece. I use 1/4" foil for this step. I tried different sizes and found that this size fit best over the replacement piece and looks the same size as the original lead.
I could have used gray backed lead and the results would have been better looking but then the foil wouldn't have shown up as well on camera.
I could have used gray backed lead and the results would have been better looking but then the foil wouldn't have shown up as well on camera.
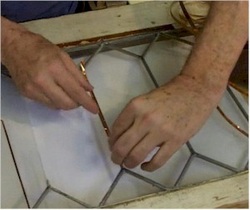
I then apply foil to each of the bare sides of the window where the lead has been removed both top and bottom.
First, I apply it along the top surface of the glass..
First, I apply it along the top surface of the glass..
Then I fold it over onto the side of the glass and then up underneath the piece.
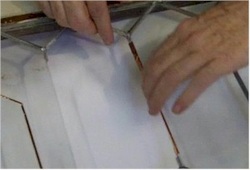
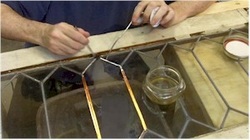
With all the foil in place, I put the replacement piece into the window.
Then I apply thinner foil that's about the same width as the original lead to the open joints in the glass.
I use a screwdriver to gently pry the glass into place by twisting the screwdriver gently. I'm careful so I don't crack the glass.
I use a screwdriver to gently pry the glass into place by twisting the screwdriver gently. I'm careful so I don't crack the glass.
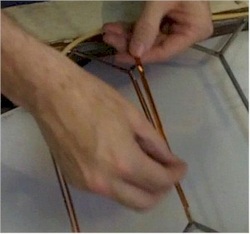
Then I apply thinner foil that's about the same width as the original lead to the open joints in the glass.
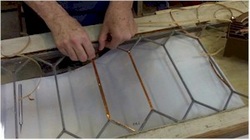
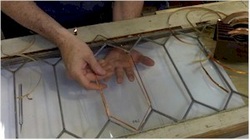
I do this all around on the bare places so I can solder easily.
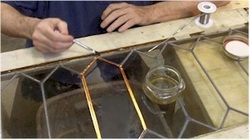
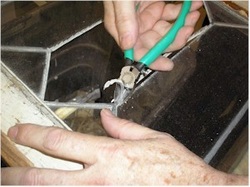
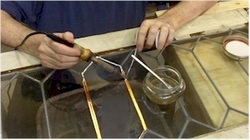
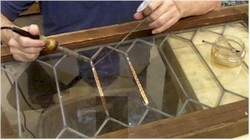
With the copper foil in place, I'm ready to solder the repair. I first flux the spot I'm repairing, paying close attention to places where the old lead and new foil touch each other.
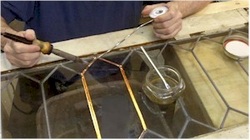
I solder the copper foil areas just as I would with any foil project. I touch the solder and pull away to allow it to seek its' own level and be as smooth as possible.
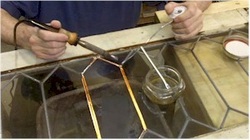
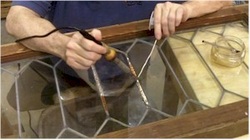
I'm careful not to heat the solder spots too much so that solder won't drip through. Notice that I have a garbage can below to catch any drips I may have.
I get to the joint between old and new and find that it's difficult to get flow to the old lead.
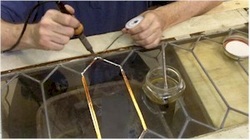
I use the tip of my iron to scrape the old lead, revealing surfaces that let the solder stick to it.
After adding more flux and working the area a little more, I get a good bond.
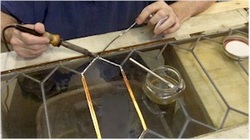
Then I can finish the foiled areas.
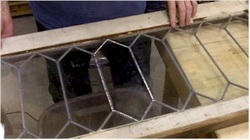
When it's complete, I'm ready to flip the window and start on the other side.
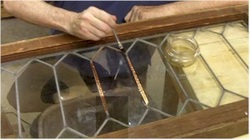
I didn't have to cut away as much of the old lead on this side, so there's less to solder.
Soldering goes pretty quickly, and it's fairly smooth.
The solder flows on the copper foil like normal. At the joints where lead and foil meet, I work the area like before with the tip of the iron. I have to be careful not to let it get too hot or the solder will run through. If I had too much trouble getting the lead to accept the solder, I would use a brass brush or steel wool or sandpaper to rough up the lead.
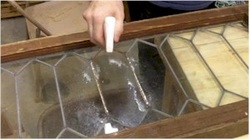
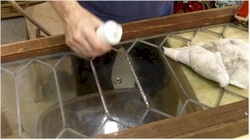
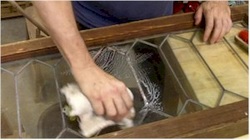
Once done, I spray the window with some Kwik clean.
I rub it briskly with a rag to remove the flux.
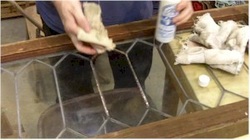
On this side, I prepare the lead to take patina by adding a dimes size puddle of CJ's to get the lead ready to accept the patina. It worked so well that the lead became darker than I wanted, so on the front I skipped the CJ's.
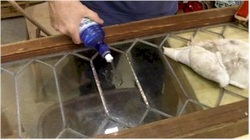
Then I add a squirt of water to the CJ's.
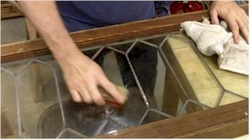
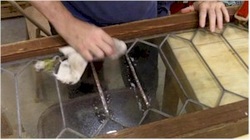
And brush in all directions to clean glass and lead well.
I use a stiff bristle brush. I press firmly but not hard, just polishing and scrubbing vigorously.
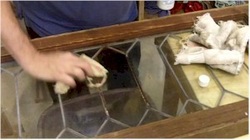
Then I wipe it off with a clean rag.
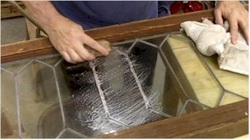
I can then take a small rag to apply patina. I wet the rag a little, because I don't need much patina.
I use a small rag because patina will corrode the rag within 24 hours. It's pretty corrosive.
I use a small rag because patina will corrode the rag within 24 hours. It's pretty corrosive.
Then, I wipe it down, flip it over and do the other side. I didn't polish the window or clean the whole thing. The owner wanted it to look old and dirty so that it had that "collectible" charm.
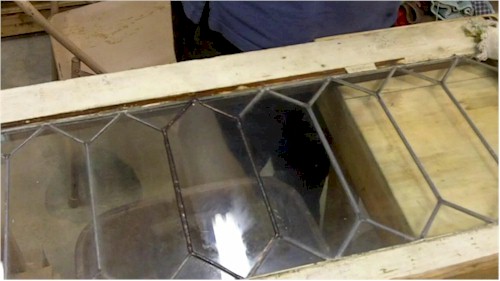
Here is the front side complete, it looked a little dark, but with some buffing with a rag, I got the lead surfaces to match pretty well.