

|
Glass Tips & TricksNewsletters from our past converted to fresh articles about stained glass.
|

|
Building A Frame For Stained Glass Shutters
I graduated from college as an Industrial Arts instructor, so I'm used to working with all the most professional tools. When I decided to build some shutters to fit a window in our home, I had to rely on my own tools. This project is more about woodworking, but it may come in handy if you ever need to build a frame for a piece of glass.
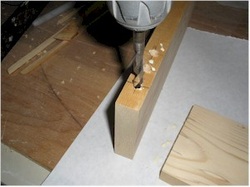
I needed the joints of the shutters to be very strong. If I had a biscuit joiner or a doweling machine, I could have used those. I had to resort to the tried and true method of using wooden dowels, so I marked my wood and drilled holes as straight as possible.
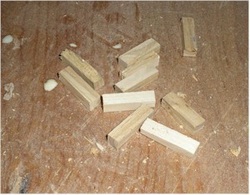
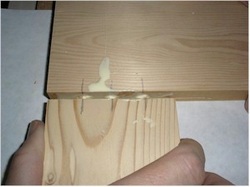
I didn't have dowels, so I cut some little bits using the band saw. Square dowels hold a lot of glue, so will be strong once the glue dries.
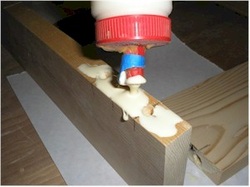
I filled the holes with glue so that there wouldn't be any voids when the dowels went in. (I filled the holes in both pieces of wood)
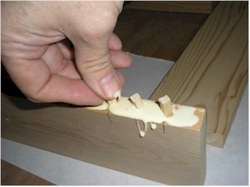
Then I inserted the home-made dowels.
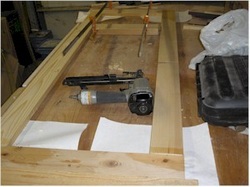
I then put both pieces together, with paper underneath to avoid sticking the joint to the table.
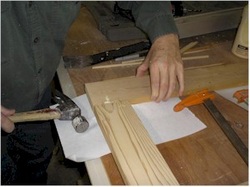
You can't see it in the photo, but at the other end of the shutter, I nailed a stop board to the table so the shutter wouldn't slide off as I worked on it. I tapped the top onto both sides (at both ends of the shutter).
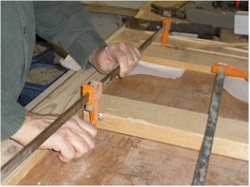
Because I didn't have long enough clamps for the shutter, I nailed a cleat onto the table that I could use to squeeze the shutter with short clamps. The nailer at the bottom kept the shutter in place.

After the clamps were in place, the top was pulled up at a slight angle to the rest of the frame. If I left it, I would have a lot of sanding to do.
(I wiped the excess glue off with a damp rag)
(I wiped the excess glue off with a damp rag)
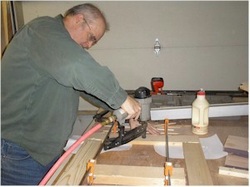
The easy solution was to nail the top to the work bench which held it straight.
Here you can see the entire shutter held in place to dry on the workbench and the bottom nailer holding the shutter in place at the bottom.
24 hours later, I pulled the frame off of the work bench and glued up the second one.
24 hours later, I pulled the frame off of the work bench and glued up the second one.
I cheated and took the two frames over to a cabinet shop where they were sanded down perfectly, in a fraction of the time it would have taken me to do it by hand.
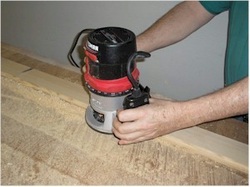
Then I set my router and cut a rabbit to receive the glass.
Then I set my router and cut a rabbit to receive the glass.
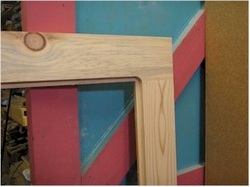
The results were good, leaving a rounded edge, so the glass needed to be rounded a little to fit in place.
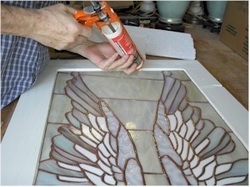
I painted the shutter, using bondo to fix a knot hole and caulked the angel windows in place. Once the window is in place, bedded in a first layer of caulk, I finish off with a second application of paintable caulking.
The finished panels look great and the shutters won't fall apart because the woodwork is strong.
The finished panels look great and the shutters won't fall apart because the woodwork is strong.

Here they are on display, when the show is over we'll install them in their permanent spot.