

|
Glass Tips & TricksNewsletters from our past converted to fresh articles about stained glass.
|

|
Moving And Handling Glass
We've all seen those trucks running down the road with their loads of glass sitting in upright racks. It's such a common sight that we may not even ask ourselves why they ship glass standing up?
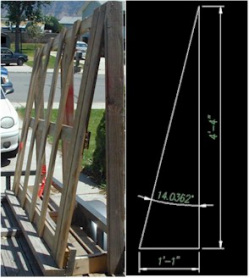
Glass racks used by commercial glass companies are designed to hold glass vertically and at a slight angle.
Our glass rack is built 52" high and the bottom is 13" wider than the top. This gives us about a 14 degree angle to hold the glass.
Glass racks used by commercial glass companies are designed to hold glass vertically and at a slight angle.
Our glass rack is built 52" high and the bottom is 13" wider than the top. This gives us about a 14 degree angle to hold the glass.
But why is this necessary?
For one thing, with the glass resting at a slight angle, the effects of gravity help to keep the glass in the rack. If the glass is standing straight up and down, the weight of the glass would easily shift over the center of gravity each time the truck turned and the glass would want to fall off of the truck.
For one thing, with the glass resting at a slight angle, the effects of gravity help to keep the glass in the rack. If the glass is standing straight up and down, the weight of the glass would easily shift over the center of gravity each time the truck turned and the glass would want to fall off of the truck.
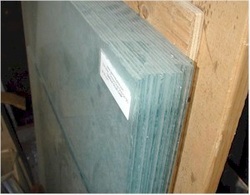
But that's not all. With the glass on an angle, it is actually less likely for rain water to leak down between sheets of glass. Two things happen when water gets between glass. First, there is a water bond formed between the two sheets, almost like a suction cup on glass. The two sheets have no air between them because it has been replaced by the water and it can be quite hard to get them apart. Second, and much worse, is the potential for the sheets to "water etch", a condition where minerals and chemicals in the water actually form deposits and cause the glass to turn cloudy.
The science of why we want to handle glass vertically instead of horizontally is quite fascinating and you can read more about it further down in this article.
But first, lets look at how to best handle an art piece to take advantage of it's vertical strength.
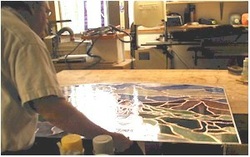
When I need to flip a large piece of glass over, I first slide it near the edge of the table for ease of movement.
But first, lets look at how to best handle an art piece to take advantage of it's vertical strength.
When I need to flip a large piece of glass over, I first slide it near the edge of the table for ease of movement.
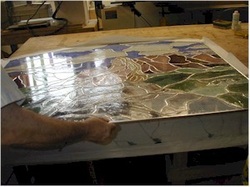
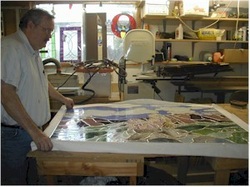
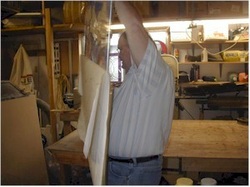
Then I slide it over the edge of the table so that I can easily grasp the glass. This piece is 5 feet wide and 4 feet high. I would recommend that you have help when turning a piece this large.
But being large makes for better pictures, so I risked it when turning this piece over.
But being large makes for better pictures, so I risked it when turning this piece over.
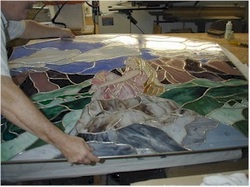
I slide the panel halfway over the edge of the table. The upper half of the window is still supported by the table and I'm holding the bottom half of the window up with my right hand.
I have to be careful to keep the window from flexing. I have to support the window just enough. Too much and I lift it and break it. Too little and I'm not supporting it and it cracks.
I have to be careful to keep the window from flexing. I have to support the window just enough. Too much and I lift it and break it. Too little and I'm not supporting it and it cracks.
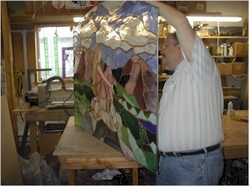
Letting the middle of the window rest on the table edge, I allow the bottom of the window to drop, holding it with my right hand and I gently pull the top half of the window up with my left hand. This is a real balancing act and this is the time when having two people really helps.
As the window becomes vertical, the weight of the whole panel is held in my right hand and I ease the panel up above table height so that I can rest it on the table edge. At this point, the whole panel is very wobbly and my movements have to be very precise and gentle.
(I simply let the paper that the panel was resting on fall away.)
(I simply let the paper that the panel was resting on fall away.)
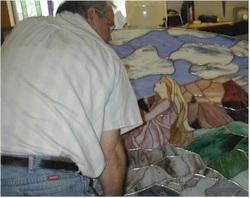
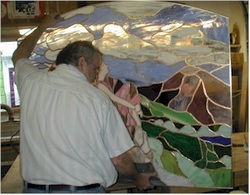
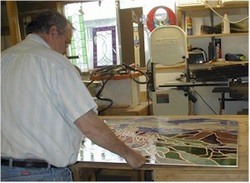
As I gently rest an edge of the window on the table edge, I am able to begin to turn the panel.
The paper finally falls away completely as I continue to carefully spin the window. The piece is so large that any movement causes the whole panel to rock back and forth, so I really must use caution not to break it.
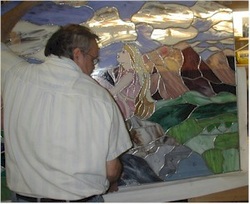
Once I get the panel turned, I position myself so that I can lower the window back to the table.
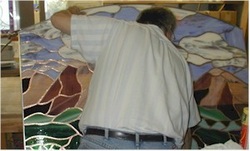
I lower the panel below the table, so that I can rest the middle on the edge of the table just like I did before.
I lower the top half of the window while raising the bottom half, with the center on the table edge.
Then I push the window onto the table, ready to solder the backside.
The science of why we want to handle
glass vertically instead of horizontally is easy to understand if we just
remember that it is very thin.
Since glass is such a thin sheet, it's shape
determines a lot of it's strength. When a sheet of double strength
(1/8") glass is held horizontally, the weight of the glass pulls
against it . If the piece is small, say 6" square, the weight pulling
on the glass is pretty small in comparison with it's size.
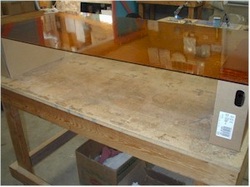
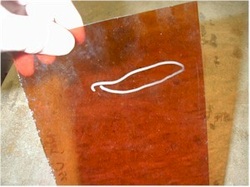
If a sheet of glass is large, the weight pulling on the glass will be great enough to allow the glass to bend or at least "want" to bend. This condition puts the glass at stress and it "wants" to break.
(See how it bows slightly?)
(See how it bows slightly?)
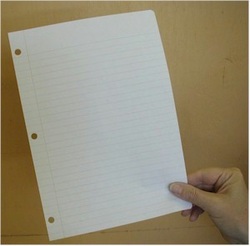
Think of a piece of paper. When a sheet of paper is held standing up, it stands a little easier than when you hold it vertically. Try this: hold an 8 x 10 piece of paper with just two fingers in a vertical position. It's not easy, but you can do it.
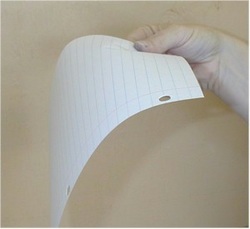
Try to hold your piece of paper with two fingers horizontally. It doesn't work, it's weight pulls it down.
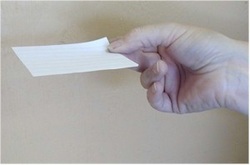
Now take some scissors and cut a 2" x 2" square from the paper. Hold it horizontal. Why doesn't it fold? Because the pull of gravity on it is less, just like the weight of the 6" square piece of glass.
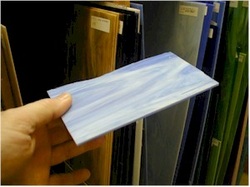
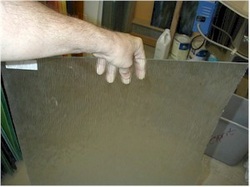
If that same bigger piece of glass is stood vertically, the weight of the glass is supported by the surrounding glass. In other words, the glass tries to support itself.
If that same bigger piece of glass is stood vertically, the weight of the glass is supported by the surrounding glass. In other words, the glass tries to support itself.
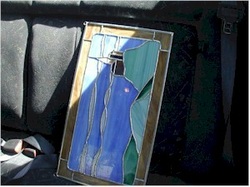
Now you know why we recommend that customers lean a panel up in the back seat, when they take it home.
Here, it would be a good idea to mention the safe handling of regular sheets of glass.
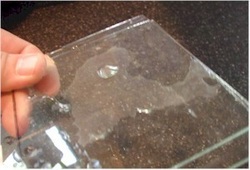
If you've been buying glass for very long, you know that sometimes in shipping a sheet of glass can get a small fracture in it, sometimes so small it's difficult to see.
This fracture represents a weakness in the glass which can give way at any time.
If you've been buying glass for very long, you know that sometimes in shipping a sheet of glass can get a small fracture in it, sometimes so small it's difficult to see.
This fracture represents a weakness in the glass which can give way at any time.
If you handle glass sheets at all times as if they have a hidden fracture that is about to give way, you will increase your safe handling of glass. When we first started our studio, we had to move our glass a lot and it fractured several times, so we got used to handling it safely.
Always carry glass from the top of the sheet or at the sides of the sheet near the top. Assume that it might break away at any moment. Keeping this possibility in mind will cause you to dress and act safely.
Always carry glass from the top of the sheet or at the sides of the sheet near the top. Assume that it might break away at any moment. Keeping this possibility in mind will cause you to dress and act safely.
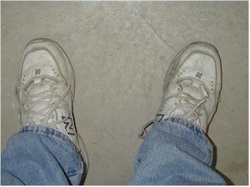
You'll wear shoes that will protect your feet if glass falls on them. You'll carry glass in such a way that if it breaks it will fall away from you, but will not fall towards other people.
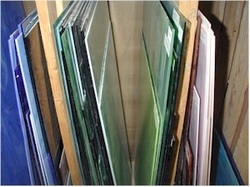
And you'll store glass carefully to minimize fractures from forming in the glass.