Gomm Studios   (385) 392-7989
Gomm Stained Glass
  • Home
  • Projects
  • Classes
    • Learn More About Studio Classes
  • STORE & RESOURCES
    • Art 4 Sale
    • Amazon Shop
    • Etsy
    • Tips Articles >
      • Fixing Windows >
        • Repairing Severe Damage
        • Repairing A Broken Piece Of Glass
        • Fixing A Small Break In A Big Piece Of Glass
        • Faking A Repair
        • Doing A MAJOR Repair
        • How To Repair A Leaded Panel
        • How To Repair Stained Glass That Has Separated
        • How To Rebuild A Leaded Glass Window W/ Copper Foil
        • How To Repair A Moderately Broken Art Glass Panel
        • How To Repair An Insulated Stained Glass Window
        • Changing the Border Glass In a Leaded Panel
        • Repairing A Stained Glass Panel For An Artist
        • Repair Using A Dremel Tool
        • Quick(er) Lead Repair
      • Tricks Of The Trade >
        • Insulating Glass So It Can Be Hung In A Door
        • Moving And Handling Glass
        • Cutting Diamonds On Very Rough Glass
        • How To Add Coining To A Panel For A Very "French" Look
        • How To Shorten A Stained Glass Panel
        • How To Trim And Cut A Stained Glass Panel That's Too Long
        • How To Build A Jig To Help Cut Bevels
        • How To Cut Stained Glass Without A Pattern
      • Reinforcing and Framing Glass >
        • Reinforcing A Large Panel
        • How To Aggressively Reinforce A Window
        • Soldering A Zinc Edge On A Panel
        • How To Solder A Reinforcing Edge On A Curved Panel
        • How To Put Metal Around An Octagon Shaped Panel
        • Building A Frame For Stained Glass Shutters
      • Shipping Stained Glass >
        • How To Ship Big Stained Glass Panels
        • How To Build A Solid Shipping Crate
        • How We Crate Same Size Multiples of Glass
        • How To Build A "Double Foam" Crate
        • Loading Glass On A Trailer
      • Lighting Projects >
        • Installing Art Glass In A Pool Table Lamp
        • How To Build A Panel For A Backlit Space
        • How To Reinforce A Stained Glass Skylight
        • Creating A False Skylight
        • Building A Four Sided Lamp
        • Repair A Cheap Lamp Shade
        • Building A Stained Glass Lamp With A Worden Mold
      • Installing Stained Glass >
        • How To Install Stained Glass in an Existing Window Frame
        • How To Install Stained Glass In A Cabinet Door
        • How To Hang A Stained Glass Window
        • How We Install A Panel In An Arched Window Opening
        • What Ttype Of Caulk To Use
      • Sandblasting Stained Glass >
        • How To Sandblast Stained Glass
        • How We Sand Carve A Stained Glass Transom
        • Setting Up A Sandblast System
        • How To Sand Carve A Rose In Glass
      • Organizing Your Studio >
        • Build Your Own Work Bench
        • Chemicals We Use In Our Studio
        • Getting A New Glass Order
        • Build Your Own Stained Glass Rack
        • Converting To A Lead Free Studio
      • Bring New Life To Windows >
        • Removing Corrosion From Stained Glass
        • Re-Apply Patina To Stained Glass
        • How To Clean A Really Dirty Window
        • Clean And Apply Patina To Stained Glass
        • Cleaning And Adding Patina To A New Stained Glass Panel (revisited)
        • Easily Clean Corrosion Off Of Stained Glass
      • Unusual Projects >
        • Building A Stained Glass Globe
        • The Painted Leaf Project
        • How To Paint A Face On Stained Glass
        • Fusing A Stained Glass Necklace
        • Building A Stained Glass Picture Frame
        • Building A Stained Glass Jewelry Box
        • Make Stained Glass Charms
        • Repairing A Stained Glass Angel By Making Our Own Glass
      • Soldering Techniques >
        • Fix or Reinforce Glass With A Solder Bridge
        • How To Solder For A Stained Glass Repair
        • Reclaiming Old Flux Core Solder For Use In Stained Glass
        • Soldering Technique-Fixing A Foil Problem
      • Basic Skills >
        • How To Cut Stained Glass
        • How To Cut Stained Glass with a T-square Cutter
        • How To Cut A Tight Curve In Stained Glass
        • Cutting Very Thin, Irregular Stained Glass Pieces
        • Cut Glass Using A Straight Edge
      • Advanced Craftsmanship Skills >
        • Cut Glass Using A Taurus Ring Saw
        • Drill Holes In Stained Glass With Diamond Drillbit
        • Drill Holes In Stained Glass With A Grinder
      • Business Tips >
        • Marketing Stained Glass
        • Helping Your Stained Glass Business (And Yourself) Survive With Style
        • Mistakes Happen To Us All (And Then We Fix Them)
        • Converting To A Lead Free Studio
    • YouTube Videos
    • Free Patterns
  • About Us
    • Instagram
    • Shows And Galleries
    • History Of Our Studio
    • Articles About Us
    • Links
    • Contact Us
Picture

Glass Tips & Tricks 

Newsletters from our past converted to fresh articles about stained glass.
Picture

Doing A MAJOR Repair

​Here's a link to the video of this repair

Picture
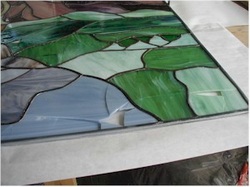
On the way to install a stained glass panel, I did a poor job tying it down because I thought tight bungee cords might crack the glass. As we drove over some railroad tracks, Jeanne thought she saw some bits of glass fall off the trailer and we knew we were in trouble.


She inspected the damage while the panel wass still on the trailer. She did a good job, she hardly cried at all!

Picture
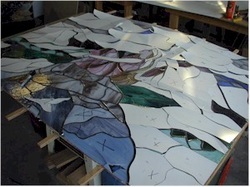
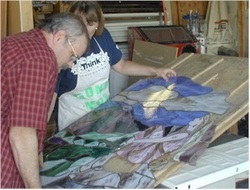
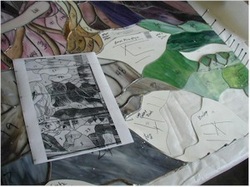
We laid the intact, broken panel on paper so we could trace it's outside size on the new pattern. This would allow us to put it back together and have it be the same size as it was originally.

Picture
We then moved the broken panel to another worktable and laid it on sticks which were spaced about every ten inches. This would let us drop solder and glass below the surface of the window while we worked.

Picture
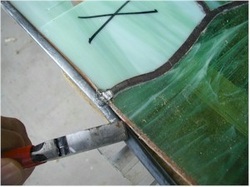
I then heated the edges of the metal that needed to be removed and rocked it up and down as it cooled. By doing this, the solder joint hardened as a "cold" joint which is easy to break and often doesn't even stick.

Picture
Then I applied pressure on the metal as I moved along and soon it came away from the window.

Picture
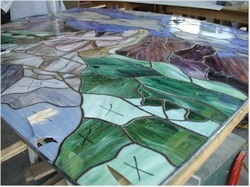
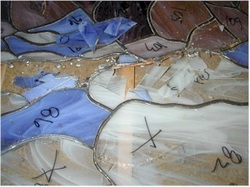
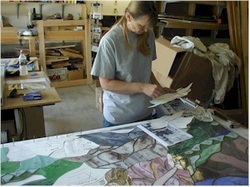
We laid out the old pattern pieces on the window. Once the broken pieces were all identified, we didn't need to lay out any more pattern pieces. We then marked the number of the pieces on the glass with a marker. And we wrote on the pattern pieces that corresponded to broken pieces with a note as to the color and direction of the glass.

Picture
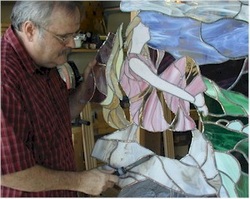
I scored all the broken pieces and began to remove them with pliers, taking care not to break surrounding pieces.

Picture
Here, broken glass is beginning to pile up and holes are forming where we want them. 

Picture
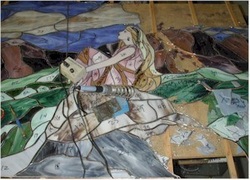
As pieces begin to be removed, you can see how well using the sticks worked to let melted solder run to the surface below.

Picture
I turned the panel so that the edge I was working on was close to the worktable edge. Then I could get closer to the work.

Picture
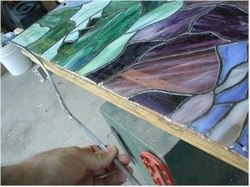
I ran a hot solder iron around the inside surface where the broken piece had been removed while gently pulling on the old copper foil. As the solder melted, the old foil pulled away and the foil on the piece that remained, stayed in place.

Picture
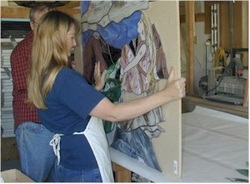
Next we faced the problem of how to move the fragile panel from the work table to the work surface where we had the pattern paper laid out. We realized that we could tilt the table which would allow us to pick up the piece without further damage.


Picture
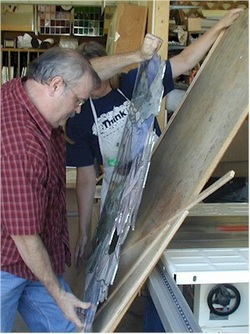
Jeanne tilted the work table surface as I caught the glass and lifted it up. (See how it bent as it was lifted).

Picture
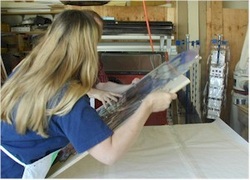
I was then able to remove solder from the backside of the panel, while it was standing vertical, so that it would lay flat.

Picture
I carried the panel to the work surface where I wanted it, but wondered how to lower it without damage. I considered letting it fall into place and hoping that air resistance would slow it enough to keep it from shattering.

Picture
We decided that a handy board would be a good support for the piece.

Picture
And we lowered it gently into place.

Picture
Then we slid the board out from under the panel like a magician pulling the table cloth from under a place setting. 

Picture
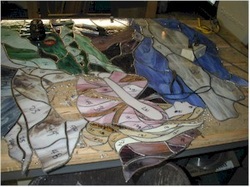
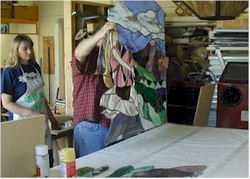
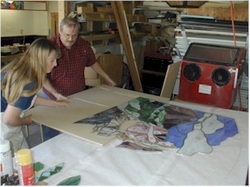
Jeanne then matched up the pattern pieces to where they should go using a black and white print of the window before it was broken as a guide.

Picture
As she laid out the pattern pieces, we cut them and foiled them and laid them back into place.

Picture
Now she's all ready to be soldered again. It was a long process to get back to where we were when we started.  Originally we spent two weeks building this panel and the repair took three weeks to complete. We have learned to tie panels down much more securely.


Picture
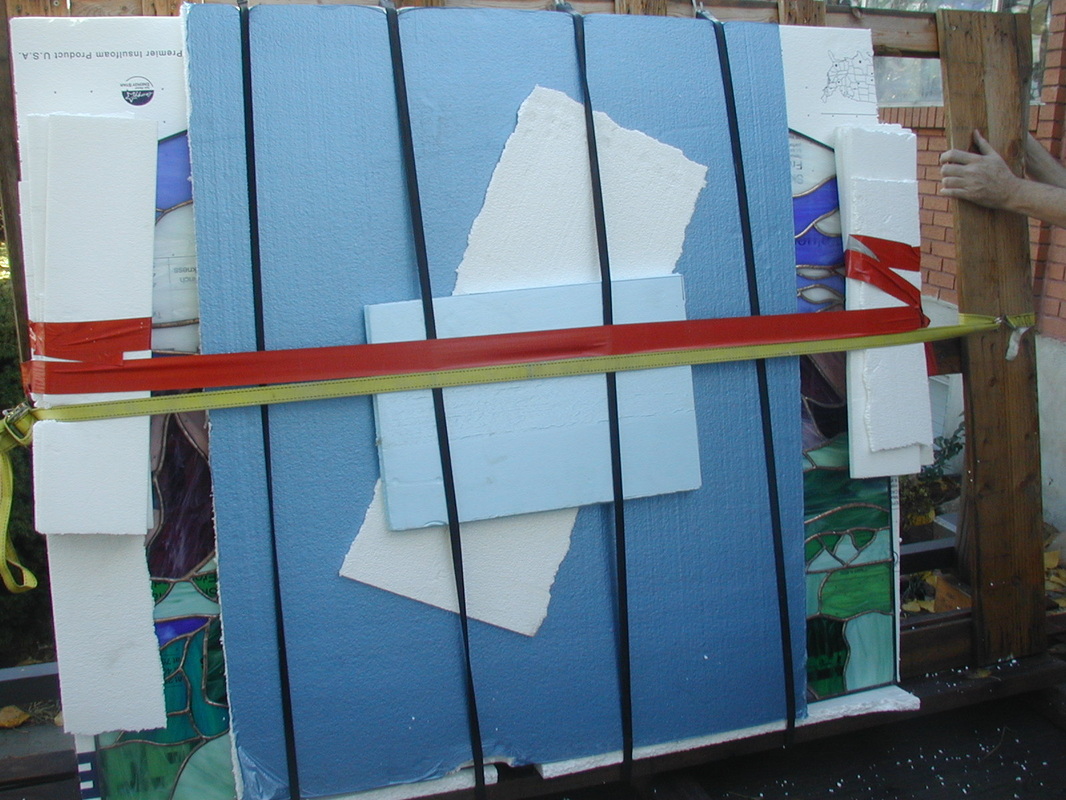
Repairing a window is much harder and time consuming than building it the first time. So shipping it with care is essential. Otherwise, you'll end up redoing work and wasting time. (This was a first time using this much foam to ship a panel and it worked so well that now we sandwich panels between entire sheets of foam insulation.)
Picture
And here she is on the day of the install, looking good as new!

Home

​
Stained Glass Books
​

Stained Glass Videos

​Links Page

Stained Glass
Art Therapy

​Studio Classes

OnLine Classes

​Portfolio

​Etsy Patterns

​UCAB Sourcebook

Build Your Own Table

​Kaleidoscope


Tips & Articles

Patterns
Mosaic Patterns

​Contact Us

Art For Sale

​Free Videos

Creativity Quotes
​

Date Night
​
​
History Of Our Studio

​Articles About Us

​Shows And Galleries

​Join Our Email List

5 Ways To Thrive
​​

Copyright © 2016-2024