

|
Glass Tips & TricksNewsletters from our past converted to fresh articles about stained glass.
|

|
Changing the Border Glass In a Leaded Panel

The first thing to do, whenever rebuilding a window is to lay it out on white paper and trace the outline. This will help you to keep it the same size as you work on it.
Use horseshoe nails to keep it in place. The flat sided nail keeps the glass right where you want it.
Use horseshoe nails to keep it in place. The flat sided nail keeps the glass right where you want it.
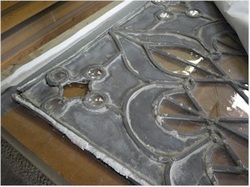
Here's a picture of a leaded window to be rebuilt in a friends studio.
Andrew tells me that lead came windows that range from 10 years to 100 years old were typically built with "industrial age" lead came which didn't have the same mixture of lead and other metals that older or newer came have. That's why the old lead crumbles and needs to be replaced.
The guilds that developed lead came prior to the 1900's lost much knowledge when the industrial revolution caused them to go out of business. But scientists at NASA have helped reconstruct what some of the old formulas were.
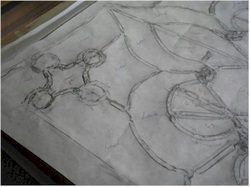
Here's a rubbing that they made of the entire panel so they will know how it goes together if there is any problem in the rebuild. They take a rubbing of every panel to be rebuilt just in case.
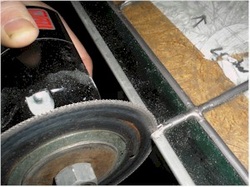
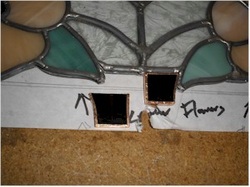
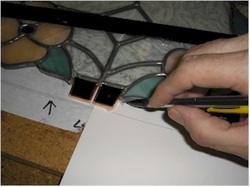
Next use your zinc saw (or jigsaw) to cut in between all the outside joints. Saw halfway between the lead came and you may not dull the blade too badly.

There should be a cut between each piece of glass in the window. MAKE SURE to wear a dust mask or respirator when cutting lead. This will prevent you from breathing lead dust, something you want to avoid!
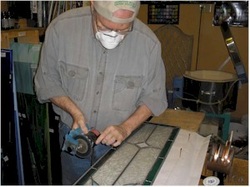
The blade throws grit around, so I wear a ball cap (backwards so debris doesn't bounce off the brim of the cap).
If this were a long process, I would wear a respirator, but I chose to wear a dust mask for this quick step. A respirator is the best choice because it protects you from breathing lead dust.
If this were a long process, I would wear a respirator, but I chose to wear a dust mask for this quick step. A respirator is the best choice because it protects you from breathing lead dust.
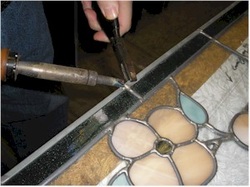
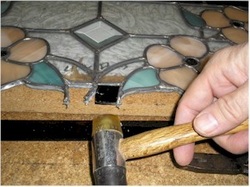
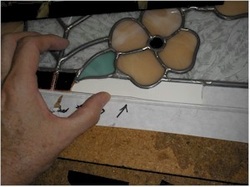
Take the border metal off using both a solder iron and pliers. Melt the solder and move the zinc up and down as it cools which will allow the solder to break loose.
I prefer to remove the metal from one side of the panel, do the replacement of the glass on that side and then turn the panel around to do the other side. This lets the window stay fairly sturdy as the process continues and keeps things less messy.

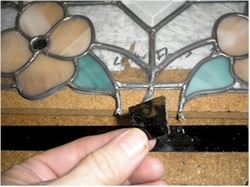
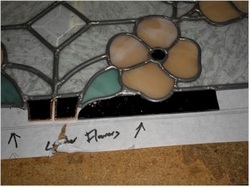
Once the metal edging is removed, I can take out the border glass. I grip it with pliers and gently wiggle up and down. This takes a long time, because I have to shake the cement that's holding the glass and lead loose without breaking the glass.
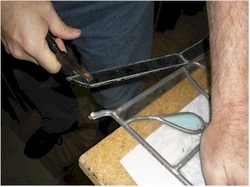
When the glass starts to pull loose, I can get it out, but I have to be careful not to pull the inner lead away from the surrounding glass.
I use the pliers to twist the next lead away from the next piece I'm going to remove so I'll have less holding the glass as I remove it.
When we started, we thought we might be able to put the replacement glass in between the old lead.
I tapped the glass gently into the lead channel.
But the lead was too deformed in the removal process.
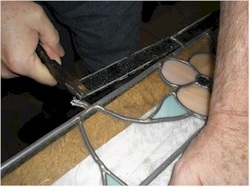
So I took some nippers to remove the old lead and clipped them off flush with the flat inner came.
I made an effort not to crush the old came because I was going to want to get the new glass in-between that lead.
I made an effort not to crush the old came because I was going to want to get the new glass in-between that lead.
Our installation of the replacement parts was now much easier.
When I needed a pattern piece for irregular shapes, I simply slipped poster board under the area for the replacement glass and traced.
One thing I had to keep in mind was that the glass needed to also extend into the old lead, so I added a bit to the width when I cut out the pieces.
One thing I had to keep in mind was that the glass needed to also extend into the old lead, so I added a bit to the width when I cut out the pieces.
To make it easier, I began to add the extra to the pattern piece and then slipped it into the lead channel to insure a good fit.
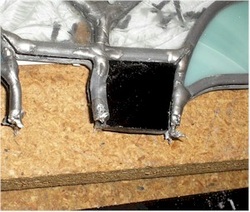
Then I cut and ground the glass. Test fitting it was essential. Too tight and you break it, too loose and you see space between the lead and the glass.
Each time I got a few pieces fit into place, I would place extra glass under them to hold them level.
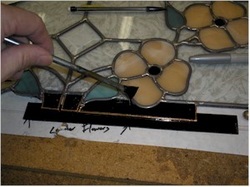
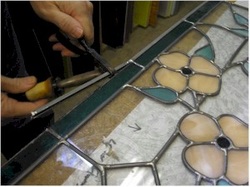
Then, I fluxed the pieces,
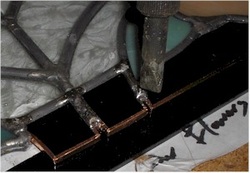
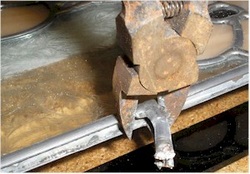
And soldered the joints that were meeting together, staying away from the outer edge.

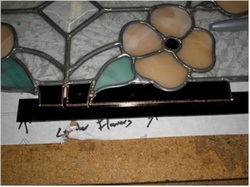
When, I got an edge complete, I set the outer bar in place and soldered it. Soldering the replacement pieces in a bit at a time helped me to keep things tight and neat.
It took over three hours to get set up and replace the glass on one edge. And I had to do that to three windows!
It took over three hours to get set up and replace the glass on one edge. And I had to do that to three windows!
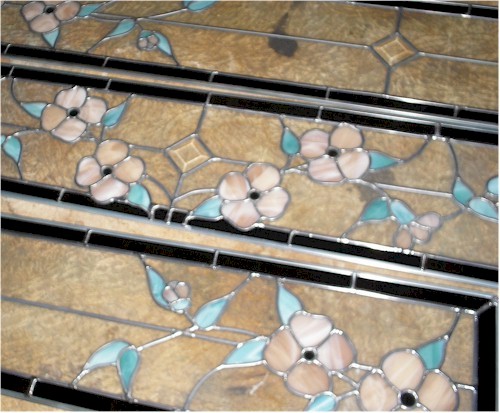
The finished windows really did look good and they should make both our client and her husband happy.