

|
Glass Tips & TricksNewsletters from our past converted to fresh articles about stained glass.
|

|
How To Repair A Moderately Broken Art Glass Panel
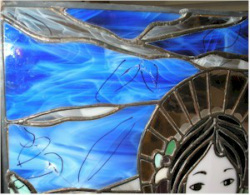
Recently a client's little boy got excited chasing the cat and we ended up with some damage to one of our "Women Of Faith" panels. All but one of the sky pieces were broken and all but one of the clouds were broken.
We counted ourselves lucky that her face wasn't damaged.
After an accident, it usually takes me several weeks before I can face the job of doing the repair, but once I begin, the fix goes rather quickly.
We counted ourselves lucky that her face wasn't damaged.
After an accident, it usually takes me several weeks before I can face the job of doing the repair, but once I begin, the fix goes rather quickly.
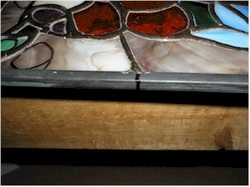
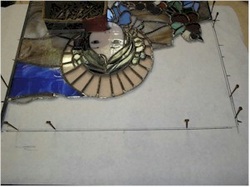
On this repair, I see that I will have to remove the entire top edge of the zinc outer bar and about 1/3 of the zinc on the side of the panel.
I mark the zinc where it will be cut.
I mark the zinc where it will be cut.
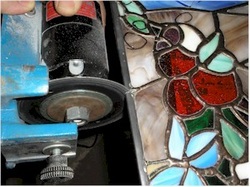
Take the table top off of your zinc saw and (using a dull blade) cut directly into the zinc and cut back into the middle of the lead line.
-Use a dull blade because a sharp one will get dulled if the cut touches any of the glass as you cut.
-This is a fairly dangerous step. You need to wear a dust mask so you don't breath any lead and you need a face shield to protect yourself. Only do this if you feel confident in your ability, otherwise use a hack saw to do the cut.

The next step is to lay the window, especially the damaged area onto a piece of paper so that you can have a pattern to follow when you rebuild it. Here I'm marking the spot where the zinc was cut.
Trace around the panel so that the repair will be able to be square as you put the panel back together.
I choose to mark where each of the lead lines are in the panel so that it will be easier to line up the pattern with the window when the time comes.
I choose to mark where each of the lead lines are in the panel so that it will be easier to line up the pattern with the window when the time comes.
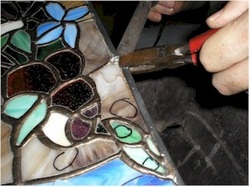
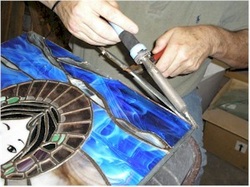
In preparation of removing the zinc outer bar, I apply flux to the joints where I plan to remove pieces.
This step may not be necessary, but I notice that the solder runs better if flux has been applied.
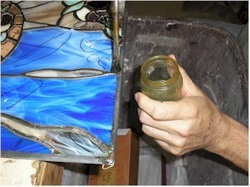
The edge of the panel hangs over the table edge and there is a trash can below to catch melting solder and pieces of glass as they get loosened.
This step may not be necessary, but I notice that the solder runs better if flux has been applied.
The edge of the panel hangs over the table edge and there is a trash can below to catch melting solder and pieces of glass as they get loosened.
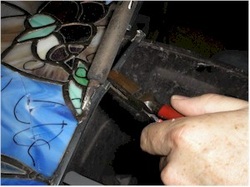
Heat both the top and the bottom of the zinc and use pliers to rock the side of the zinc that is to be removed. If you take the heat away, continue to rock the zinc up and down while it cools and you'll note that the solder joint will be cold and have cracks and weaknesses in it as it cools.
It will be crumbly and will easily give way when you're ready to remove the piece.
It will be crumbly and will easily give way when you're ready to remove the piece.
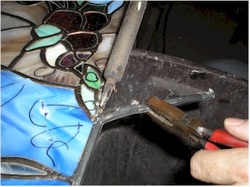
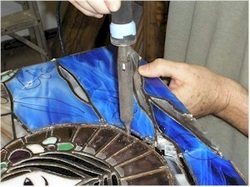
Once a solder joint is loosened, move to the next one and wiggle that one loose by rocking the pliers up and down as the solder is melted. You can grip the metal very aggressively on the outside edge since there is a hollow below in the outer bar.
Crushing the bar just slightly helps to get a good grip on the metal, just make sure the area of the crush is on the outside half of the bar (unless the glass below will be replaced, then there's no worry if the glass is crushed a bit.
Crushing the bar just slightly helps to get a good grip on the metal, just make sure the area of the crush is on the outside half of the bar (unless the glass below will be replaced, then there's no worry if the glass is crushed a bit.
You'll find that as you work your way down the zinc, it will become easier to loosen things up because the leverage on the zinc will become greater.
But you'll want to use caution as you go along, because you don't want to break pieces that don't need to be replaced.
But you'll want to use caution as you go along, because you don't want to break pieces that don't need to be replaced.
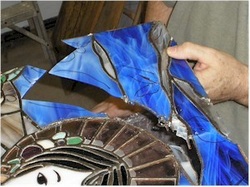
Eventually, you'll get to the end and the zinc will readily come right off.
Zinc can melt when your iron is very hot, so use caution not to get too much heat on the part of the zinc you want to keep.
Zinc can melt when your iron is very hot, so use caution not to get too much heat on the part of the zinc you want to keep.
Next, you can begin removing the damaged pieces of glass. I like to place a cloth under the window and run my glass cutter in a crisscross pattern so that the broken pieces are easier to take out. The heat from the iron often helps these pieces crack so they are easier to remove.
Heat the edges where the broken glass and the intact glass meet. Allow solder to melt enough so that it can drip right down out of the window and into the trash can below.
You can use the tip of the iron to get down between the two pieces of glass to leverage things apart.
Heat the edges where the broken glass and the intact glass meet. Allow solder to melt enough so that it can drip right down out of the window and into the trash can below.
You can use the tip of the iron to get down between the two pieces of glass to leverage things apart.
Eventually you'll be able to remove the damaged glass, note that I took out one piece of cloud that wasn't broken but was surrounded by broken glass. It will be much easier to cut a new one than try to save the old one.
As pieces get removed, try not to damage the foil on the surrounding pieces, this will save you from having to replace it when you go to solder the repaired window.
Run the edge of the solder iron tip around the intact glass, slowly allowing the solder to melt and gently pulling the old foil left from the piece that was removed, thereby cleaning up the edge.
You'll also want to run the iron at an angle under the glass edge, which will allow the solder icicles that form under the glass to melt away, giving you a smooth surface so the window will lay flat when it gets placed on the table again.

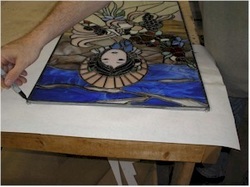
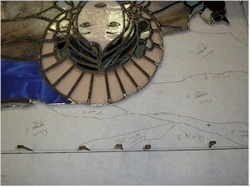
Once the glass is all removed, you can lay the window onto the paper pattern you prepared earlier.
There are additional techniques to remove broken glass that were used when repairing this panel and they can be reviewed in other articles on repair we've written.
There are additional techniques to remove broken glass that were used when repairing this panel and they can be reviewed in other articles on repair we've written.
Because I have pattern pieces that were used in the original construction of this window, I can nail down the pattern.
If I didn't have the pattern pieces, I would freehand in where the new design should go, then I would trace those lines onto pattern board and cut them out. Then I would nail down the pattern.
I also place nails at the bottom and sides of the panel to keep it from shifting while the rebuild takes place.
Because we have the pattern pieces, I take them and trace around them onto the pattern. There is a gap between each one because they were cut with pattern shears and so they have that bit of space the shears created.
** Note that I drew in the gap from the outside edge of the outer bar and where the glass edge will actually hit (about 1/8" from outside).
** Note that I drew in the gap from the outside edge of the outer bar and where the glass edge will actually hit (about 1/8" from outside).
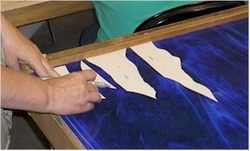
Then you lay out the pieces to cut just you would in any other window.
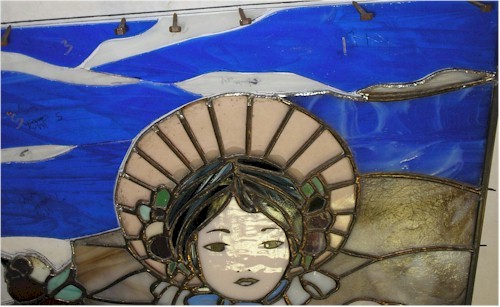
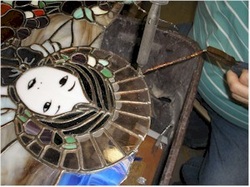
Here she is, ready to foil and solder. Because the techniques are a little different than on a straight window build, I will cover those techniques in a separate article on soldering a repaired window click here to see it.