

|
Glass Tips & TricksNewsletters from our past converted to fresh articles about stained glass.
|

|
Chemicals We Use In Our Studio
We use many chemicals in the stained glass studio. It's sometimes helpful to review how they are best used and when they should be used. This helps us achieve better (and safer) results.
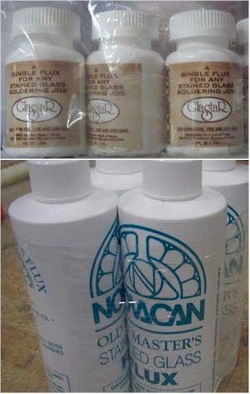
Flux: Comes in different brands and strengths. The purpose of flux is to clean the outer layer of copper foil or lead so that solder will stick to it. Acid eats away a small bit of the outer layer so that it's super clean which allows the solder to bond with the metal surface. This cleaning process is acidic so this stuff can eat through your clothes and your skin. Try to avoid getting it on you and don't let it sit on glass any longer than you must.
When using some particularly strong flux, I once left a window with flux on it overnight. When I came back the next morning, the copper foil on the side of the window that hadn't been soldered was dissolved away. I had to work hard to save that window. So now we always clean away the flux when we're done.
Some fluxes give off hazardous fumes when soldering so insure you have adequate ventilation when soldering.
Nowadays we have an easier time getting "Denver Flux", which works very well in the studio.
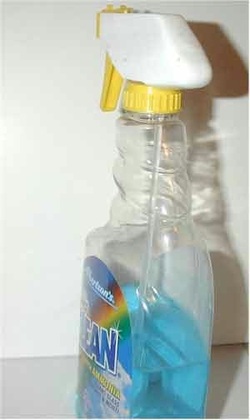
Good old blue window cleaner. We dilute it with water and clean flux off the window right after soldering. This removes the bulk of the gunk left behind from soldering.
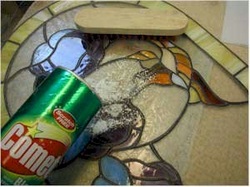
Cleanser, Comet, Ajax or the store brand. We use it all and it gets glass clean when we are worried that the damage is permanent. It's great for bring back old windows to life.
We once had a large order of windows and neglected to clean them off as we built them. Instead, we stacked them up till they were all done. Days passed and when we finally got ready to clean them, there was a haze on the windows. We had to scrub with cleanser to get most of the haze off of the glass and even when we were done, we needed to replace one or two of the panels because we really couldn't get them clean enough.
We once had a large order of windows and neglected to clean them off as we built them. Instead, we stacked them up till they were all done. Days passed and when we finally got ready to clean them, there was a haze on the windows. We had to scrub with cleanser to get most of the haze off of the glass and even when we were done, we needed to replace one or two of the panels because we really couldn't get them clean enough.
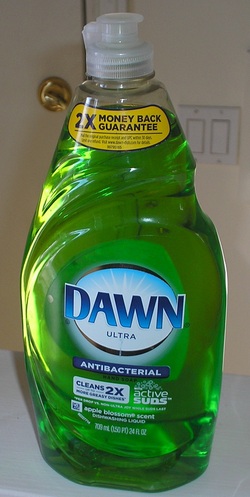
Another household product we use is Dawn dishwashing liquid. We discovered it when we heard an NPR story about how they used it to clean the oil off of birds caught in an oil spill.
When we heard that, we figured we ought to try it. When we're out of heavy metal cleaner, we encourage students who have been soldering to wash twice with it. And it works great!
Heavy Metal cleaning soap. It's thick and gooey, but it removes heavy metals from your skin so it's a good thing to have in the studio.
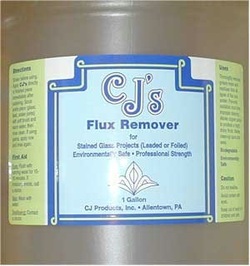
CJ's Flux Remover. After the Windex treatment, use CJ's on the panel to completely remove the flux residue still left on the window.
For years I was cheap and didn't want to spend anything extra on chemicals. When we found CJ's, we tried a small bottle and the results were great, the copper patina we applied was more vibrant than it had ever been before.
For years I was cheap and didn't want to spend anything extra on chemicals. When we found CJ's, we tried a small bottle and the results were great, the copper patina we applied was more vibrant than it had ever been before.
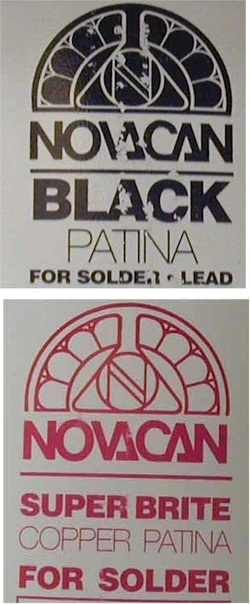
Patinas come in black and copper color. A patina colors the outer layer of the metal. They work best when applied to very clean lead lines.
We used to leave patina on windows for an hour or two so that the chemical reaction would sink in deep and give us a better color reaction. Then we left some on overnight and nearly ruined the window. A bluish residue was left on the panel. We went to the store and bought all their cleaners, orange, ammonia, and lemon cleaners. None of them worked. Finally we tried cleanser and it's abrasive nature cleaned off the residue.
Then we had to re-apply the patina because we had scrubbed it off.
When we started using CJ's to clean our glass, we started getting very brilliant results. We pre-clean the lead lines with CJ's or Kwik-Clean before the patina is applied. Afterwards we also clean the lead lines with the same cleaner to stop any adverse chemicals reactions and limit oxidation and mold occurrences.
We sometimes order Jax brand patina which is strong and has to be shipped via motor freight. We only use it for very stubborn applications.
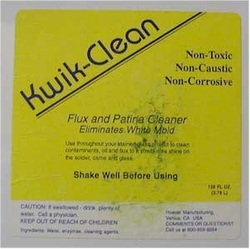
After applying patina, we use Kwik-Clean flux and patina remover to do a final clean to a panel. They claim it eliminates white mold from a window. We don't believe that the white buildup that sometimes forms on lead is mold, we think it's oxidation. But just to be sure, we choose to use this as a final cleaner. We sure don't want white buildup inside encased units.
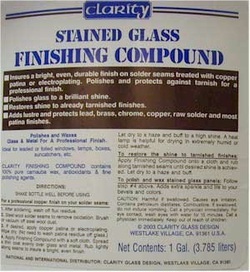
Kempro (was Clarity) Finishing Compound: This is a light clear wax that seals your metal and protects it from oxidizing. It's applied by wiping a thin coat all over the window and then allowing the wax to dry. When it dries to a hazy finish, buff the wax briskly with a rag.
Every tiny crack and crevice in the window will need to be buffed and polished. Sometimes we'll take a rag and a stick to polish along edges that are hard to get to.
We also recommend that once the window looks good on each side while lying down, you should tip the panel on it's edge and look though each pane for any streaks and haze. The window will then be very slick and shiny. This takes a lot of time, but the payoff is well worth the time, especially on panels that are going to be sealed between tempered panels.
Also Liva is a good brand that gives the same results as the Clairity product.
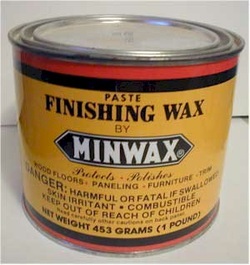
We have used Minwax on windows. It goes on easily, just the same as the clear wax, except that instead of being poured on, it's wiped on with a rag. It also has a great smell. And a can of it lasts a long time.
The first time I tried it, I was rather scared because I had never tried it and it could have easily made the window worse or made it cloudy or too waxy, then I wiped some on and there was a moment when the glass was hazy. I was terrified until I let it dry for awhile and then buffed it. It turned the glass into a brilliant, work of art.
You'll have to really work hard to buff it up, so Kempro or Liva is preferable.
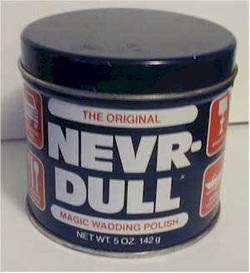
Never-Dull Rubbing Compound: A cottony can of silver polish which is good for cleaning and polishing a window. When you first apply it, the window will become a little hazy but it buffs up well. It's especially good on sun catchers because it brings the lead line up to a bright silver shine. See the June 2006 newsletter on "Cleaning Off Corrosion" for steps in using it.
Our normal supplier quit carrying Never-Dull, but a search for "Never Dull Polish" on the internet gives several good results and we just order it on-line.
Our normal supplier quit carrying Never-Dull, but a search for "Never Dull Polish" on the internet gives several good results and we just order it on-line.
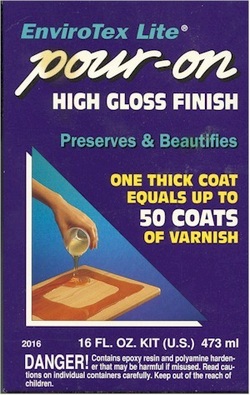
We buy this 2 part polymer from a local craft store. It's the best stuff for really bad damage. Sometimes a window gets so damaged that the only practical fix is to pour this clear polymer over the entire panel. It glues the whole piece together and stabilizes it into a solid piece.
If the cracks were noticeable, they'll still be able to be seen, but you won't have to put little pieces of scotch tape on it to keep little pieces from falling out.
It's a good idea to put the window you're sealing on paper so that if any of the finish runs through, the project won't be struck to the table.
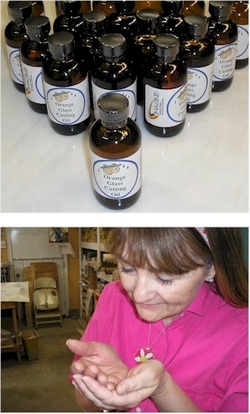
Essential oils. When cutting glass, you need to oil the cut with a light lubricant.
A few years ago, we stumbled on using orange oil instead of kerosene when cutting glass. What a difference, when you get orange oil on your hands, it smells good. When you get kerosene on your hands, it makes you cringe. There is something happy about using orange oil, there must be something to aroma therapy, we feel like we get a shot of it every time we cut glass. Straight essential oil gums up your cutter so we have to blend it with a food grade massage oil that does the trick!
We also keep Lavender essential oil on hand in case of a soldering burn. putting it on a minor burn or cut seems to relieve the pain almost immediately.