

|
Glass Tips & TricksNewsletters from our past converted to fresh articles about stained glass.
|

|
How To Sandblast Stained Glass
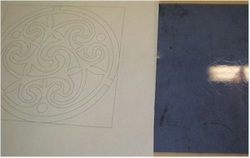
Sandblasting stained glass requires as much pre-planning as any other stained glass project. Select your glass and your pattern before starting.
Sand carving glass is a great decorative method when you need more detail than is easy in conventional stained glass. Sign lettering is a good example. Also it's a good way to get paint to stick to glass, see The Painted Leaf project.
Sand carving glass is a great decorative method when you need more detail than is easy in conventional stained glass. Sign lettering is a good example. Also it's a good way to get paint to stick to glass, see The Painted Leaf project.
We prefer actual sand blasting, the chemical acid method is just too thin, it disappears in a humid environment. But actual sand blasting deep carves the glass, giving it deep texture as well as decoration.
The first step, once your glass and pattern have been selected, is to cut a piece of resist rubber to the size of the glass.
The first step, once your glass and pattern have been selected, is to cut a piece of resist rubber to the size of the glass.
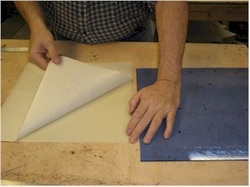
Peel the sticky back off of the resist.
And set the glass on it. Make sure it's very clean before sticking it down.
The rubber resist is thick so that it can withstand a lot of abrasion from the sand. And because it's rubbery, the sand bounces off of it. It's very similar to the resist they use when carving monuments and headstones.
The rubber resist is thick so that it can withstand a lot of abrasion from the sand. And because it's rubbery, the sand bounces off of it. It's very similar to the resist they use when carving monuments and headstones.
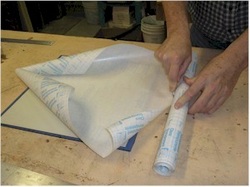
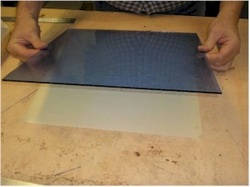
The back of the glass needs to be protected from stray flying sand while being blasted.
Cut a piece of contact paper that is big enough to cover every exposed part.
Cut a piece of contact paper that is big enough to cover every exposed part.

Then fold it over to cover the exposed glass.
Notice that we lay the sticky sheet down on the table and then lay the glass over it, this let's us avoid wrinkles.
You'll just have to use care, because static electricity will sometimes attract the sheet up from the table and then things really get misaligned.
Notice that we lay the sticky sheet down on the table and then lay the glass over it, this let's us avoid wrinkles.
You'll just have to use care, because static electricity will sometimes attract the sheet up from the table and then things really get misaligned.
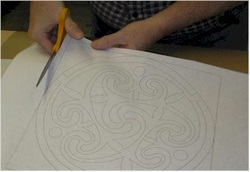
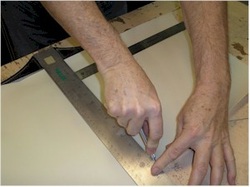
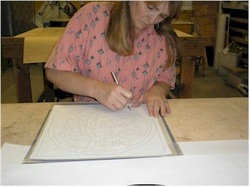
Next cut the pattern so it will fit on the glass.
Lay down some scrap paper onto your work bench and lay the pattern down, upside down.
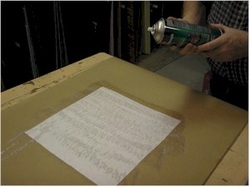
Then spray adhesive on the pattern.
Then spray adhesive on the pattern.
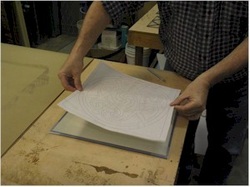
Finally, place the pattern on the resist.
You only get one shot, so use care to center things up before contact is made
You only get one shot, so use care to center things up before contact is made
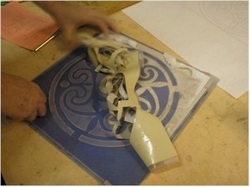
Next, cut out the entire design. The whole pattern needs to be cut out because the lines will all get blasted away when sandblasting.
(We find that a new knife blade is a good idea whenever we cut out a pattern. For some reason, if one has been used and left to sit out overnight, it will be dull the next day.)
After it's cut, you can peel off the places to be blasted. Then burnish the resist down, using the back of your knife or a fid, so it won't lift up when sandblasting.
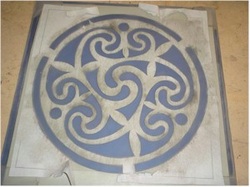
Here's the design after being blasted. Only one blast was needed on this piece.
(we've done multiple blasts on some designs which required 8 to 10 separate blasts to complete the carved figure)
(we've done multiple blasts on some designs which required 8 to 10 separate blasts to complete the carved figure)
Once the piece has been blasted, we're ready to peel off the resist.
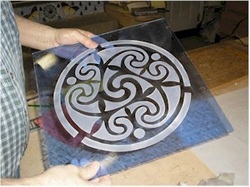
And here's the finished piece, it just needs to be cleaned and have a metal border put on it. (The image won't stay that white once the extra abrasive is washed off).
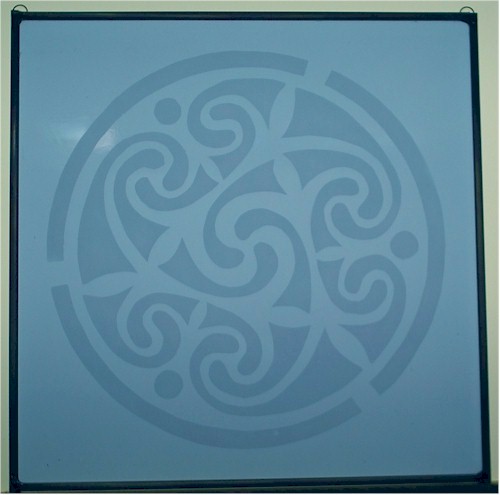
The finished piece is part of Jeanne's Mandala series which will go in her book, "Stained Glass Mandalas For Meditation." It's called, "Labyrinth," and you can see how the lines form a labyrinth. It's different from a maze which would only have one path to get through it, whereas, a labyrinth can have several openings. Much easier to walk through!