

|
Glass Tips & TricksNewsletters from our past converted to fresh articles about stained glass.
|

|
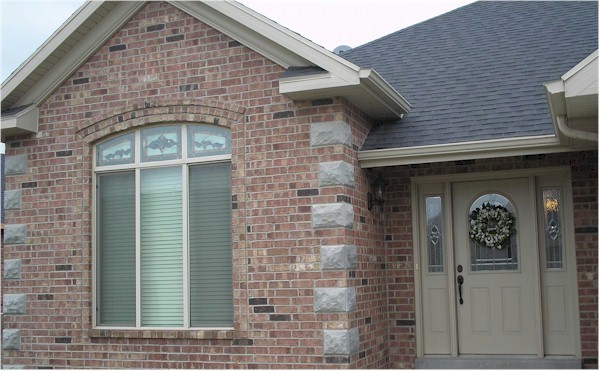
How To Install Stained Glass in an Existing Window Frame
We often have requests for articles on how to install stained glass windows. It's hard to get enough pictures to do an article because we are usually in such a hurry to get the job completed that we don't take the time to take a lot of pictures. But a while back, we took our time on an install so we could get enough pictures to show how the install went.
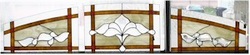
We built three panels to fit into an existing framework. We were sure they would fit because we traced a paper pattern of the existing window openings and then made them a little smaller.
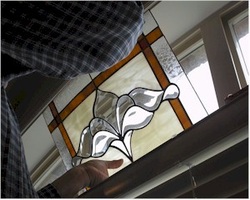
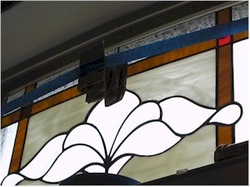
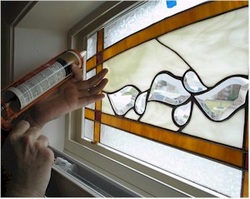
When you go to install your panels, the first thing you want to do is put the panel into the opening to make sure it fits. When I put this panel in place, there was enough of a gap to leave about 1/8" all around the panel, which was perfect.
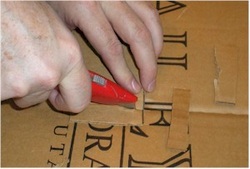
Once you determine how well the panels are going to fit, you'll want to cut some cardboard strips and fold them so they are the right height to hold your window panel up the proper spacing. You can also use wood strips or coins or anything handy as a spacer to sit the panel on.
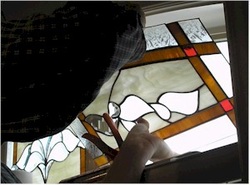
Then you'll want to put a small bead of caulk around the window opening that the panel will press into. We usually use clear caulking, but on this job almond caulk matched the window frame color perfectly.
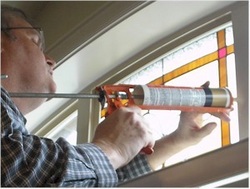
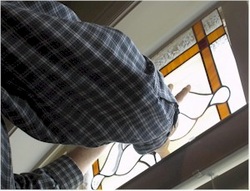
Once the panel is in place, you can begin to fill the gap between the window frame and the panel with caulking. This is where skill and practice really pays off. You don't want to apply too much caulk or you'll create a mess, but don't apply too little or light will come through the gap and the installation will look unfinished.
You can use painters type masking tape to temporarily hold the panel in place as you apply caulk and clean it off of unwanted areas.
Toilet paper is the best thing to have with you on an install, better than paper towels because you just want to wipe up caulk once with a piece and then throw it away so you don't end up spreading unwanted caulk into places it doesn't belong.
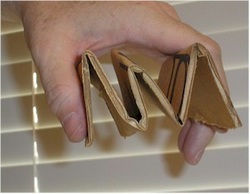
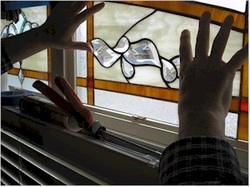
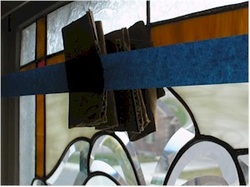
Next, make a spring out of extra cardboard. You could also use spare packing material or light weight scrap lying around as a spacer which will push against the panel to hold it in place as the silicone cures. It usually takes about an hour for silicone caulk to "skin" over and 24 hours for it to cure completely.
Tape clear across the window opening and place your "spring" spacer under the middle of the tape. You May need to add vertical pieces of tape to the edges of the horizontal tape to keep it from "popping" off.
Then you can dry fit the next window panel to make sure it fits.
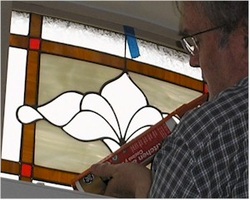
Once you're sure of the fit, go ahead and apply caulking into the opening and set the panel in place.
This view shows the 1/8" gap around the edges which will be filled with silicone and you can see the little cardboard spacer which is holding the panel up to the right height. Don't glue the cardboard into the frame. Apply caulk up to the cardboard but not onto it. When it is dry the homeowner can remove it and it will provide just the right gap so that the back of the window can breath, thereby avoiding condensation behind the glass.
Carefully fill in the gaps between the panels and the window frame.
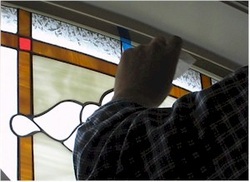
Add "springs" to hold each piece in place.
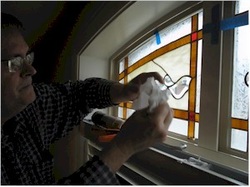
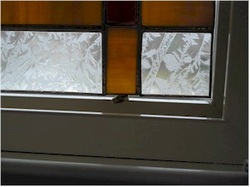
Then clean and clean and clean. Keeping the panels clean is the most important part of the install. A smear of caulking where it shouldn't be can ruin the look of the window. Sometimes it's better to leave a glob to dry where it is and then come back later and cut it off after the silicone is cured. Sometimes you can smear caulk back on your finger, clean it on toilet paper and continue squeegeeing off the excess caulk with your finger.
Make sure the home owners know to leave everything in place for 24 hours before removing all the tape and cardboard.
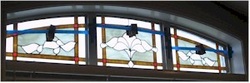
The advantage of this install is that it doesn't require special tools and the original windows can be left intact, at a cost savings to the home owner.
The stained glass you install will add beauty and value to the home and in this case, much needed shading from early morning sun that was streaming into the bedroom and blinding the occupants.