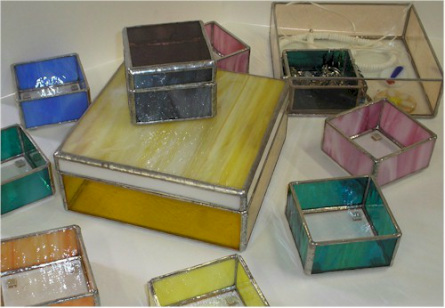
Building A Stained Glass Jewelry Box
I shot the photos for this article over several days of building Jewelry boxes, so there are some shots of one box and then I got a better shot when working on a different box, so the colors change often as the article continues.
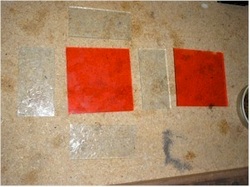
To create a stained glass jewelry box, you need to create a simple box and you can add extra details, like a flat glass lid or a 3D lid. (You can find a pdf of a 3x3 box bottom design you can print out by clicking here) print the pages out, tape them together and then you can modify the design to suit your needs.
Cut out the glass, you really don't need a pattern after building a few. Strip cutters work well for this project.
Cut out the glass, you really don't need a pattern after building a few. Strip cutters work well for this project.
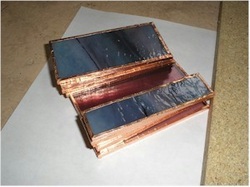
After cutting, foil each of the pieces.
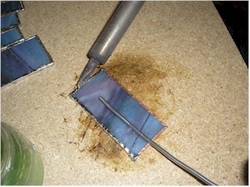
Next, tin each of the pieces. "Tinning" is the process of fluxing the foil and applying a thin layer of solder to the surface.
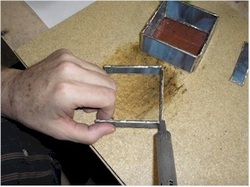
Here, I've tacked the bottom box together and I'm tacking the lid pieces together. Do this by holding the glass in place and melting the solder that was applied when tinning. It will form a very weak bond.
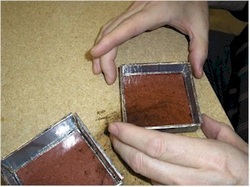
Then, place the side construction on top of the lid top (or base bottom) and rack it to fit the square of glass. Then it can be tacked in place.
Note that, so far, nothing has been permanently soldered.
Note that, so far, nothing has been permanently soldered.
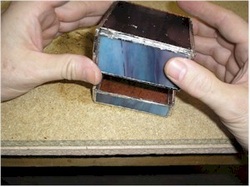
Now, just before permanent soldering takes place, check that both pieces are the same size. If they aren't you can fix them now. If they fit, you can go on to more permanent soldering.
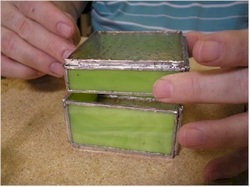
We need to align both the top and the bottom of the box to insure that both halves are the same size.
Now is a good time to slip a piece of 1/8" zinc over the edge of the top and bottom halves that will get the hinge. This will keep the foil from tearing away and give the joint the strength it needs.
Now is a good time to slip a piece of 1/8" zinc over the edge of the top and bottom halves that will get the hinge. This will keep the foil from tearing away and give the joint the strength it needs.
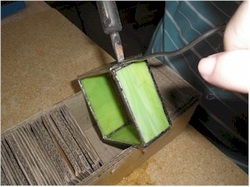
To solder the box, you need to set up for 3D soldering. This means that each time you solder a line, the edge must be horizontal. Setting the box up on a 3" wide cardboard box works very well. Then gravity will work for you, not against you.
Another way, which works well for boxes and lamp construction, is to fill a larger cardboard box with crushed and crumpled newspaper. Then as each edge is soldered, tip the jewel box to expose a different edge.
Another way, which works well for boxes and lamp construction, is to fill a larger cardboard box with crushed and crumpled newspaper. Then as each edge is soldered, tip the jewel box to expose a different edge.
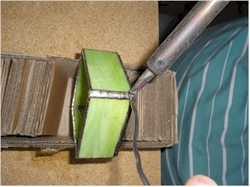
When the first pass of solder is complete and the gaps are filled, go back and solder bit by bit, building up the edge. You can turn down your rheostat to cool the iron or just keep wetting the soldering iron on a sponge by cleaning the tip more often than normal.
As you finish the edge, turn the box a quarter turn and solder the next edge.
As you finish the edge, turn the box a quarter turn and solder the next edge.
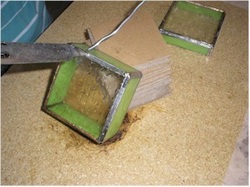
The technique we use to solder the long edge of the box is to lean the box up against a stack of cardboard pieces.
Lean the box so that the edge is as flat as possible so that solder won't try to run out of the hollow and down the sides of the box.
Do the fill pass like before.
Lean the box so that the edge is as flat as possible so that solder won't try to run out of the hollow and down the sides of the box.
Do the fill pass like before.
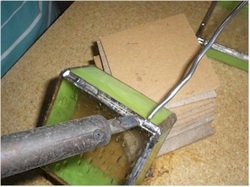
Then, do the beauty pass, adding a bit of solder a little at a time.
Try to avoid heating up one spot too much or solder will drip through. When that happens (and it will) solder in a different place. Or just wait for that spot to cool off.
Try to avoid heating up one spot too much or solder will drip through. When that happens (and it will) solder in a different place. Or just wait for that spot to cool off.
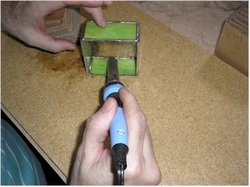
Once the outside is soldered, take your iron and run it along the inner edge of the box, melting the solder, running the bead to make the inner edge look nice.
If too much solder builds up, drag the excess out of the box while it's liquid and shake or tap it off of the soldering iron. Do this on the bottom edges then turn the next edge down till all have been completed.
Now's the time to give the pieces of the box a good looking at, make sure that all the soldering looks nice.
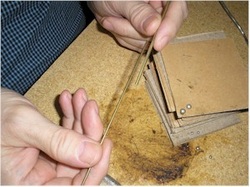
Here are two parts of a "barrel hinge." An outer and an inner tube. The inner tube fits inside of the outer tube to form a hinge.
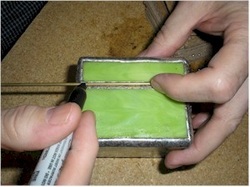
Slide both together and line up the piece with the edge of the box and mark where it will be cut.
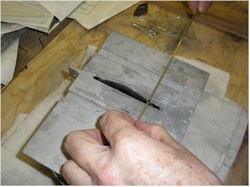
Cut it on the saw, both the inner and the outer pieces at the same time.
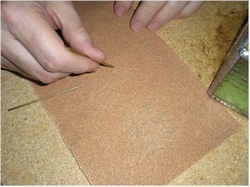
Rub the cut edge against a piece of sandpaper to remove rough edges.
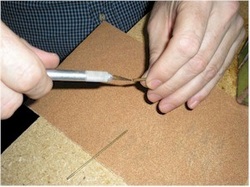
Then take a craft knife and spin it inside the holes at the ends of the tube to remove any burrs of metal.
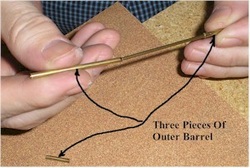
Take the outer brass tube (only) and cut two short pieces off of it. This will form the ends of the hinge and the left over longer piece will form the center of the hinge.
Sand and clean the tube pieces like before and assemble the hinge. Short piece, long piece and then short piece threaded onto the inner brass.
Sand and clean the tube pieces like before and assemble the hinge. Short piece, long piece and then short piece threaded onto the inner brass.
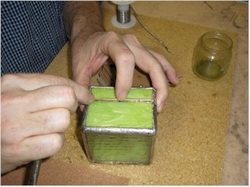
Place the hinge onto the joint where it will be soldered, on the surface that has the 1/8" reinforcement. Each of the three pieces of the hinge brass should be touching each other. If you leave a gap, the box lid will be able to shift back and forth.
Put a very small amount of flux on one side only of each of the short pieces (the same side).
Put a very small amount of flux on one side only of each of the short pieces (the same side).
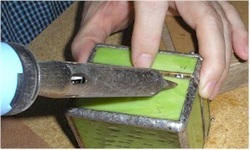
Then tack solder the short pieces. The idea is to only solder one side. If you solder both sides (top and bottom of the lid) It won't work like a hinge. If you accidentally solder the center piece at the same time, it won't work either.
If you make a mistake, just start over with a new hinge. The brass pieces aren't too costly and you'll soon be an expert at soldering the hinges.
If you make a mistake, just start over with a new hinge. The brass pieces aren't too costly and you'll soon be an expert at soldering the hinges.
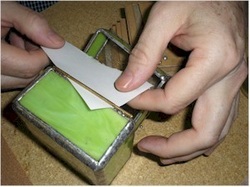
Once, the end pieces are tacked, take a piece of paper and slide the corner of it up between the center hinge piece and the box edge. This will provide a guard to help you from accidentally soldering the center hinge to the wrong place.
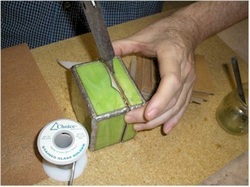
Then you can solder the center tube to the other side of the box. Stay away from the very edges of the hinge tube.
Beginners often get too close and "sweat" solder down into the space between the inner brass and the outer brass, and then the hinge won't operate.
Don't get discouraged if you have to start over, this is a new skill and may take a little practice.
Beginners often get too close and "sweat" solder down into the space between the inner brass and the outer brass, and then the hinge won't operate.
Don't get discouraged if you have to start over, this is a new skill and may take a little practice.
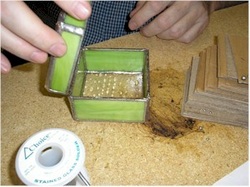
Once the hinge is properly soldered, remove the paper. If the lid opens and closes, you've got a good hinge. If it's slightly out of alignment you can bend it to one side or the other to get the right swing on the lid.
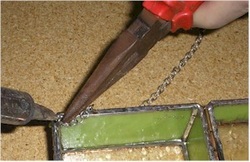
Next, take a piece of chain and solder the end link into the inside front corner of the box. It goes in the corner for strength and inside so the chain doesn't interfere with opening and closing the box.
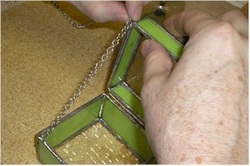
Lean the lid backwards, a little past a 90 degree angle so that the lid can open and gravity will hold it there. Hold the chain where it should be cut.
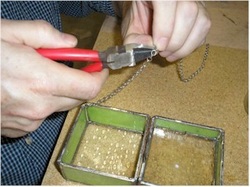
Clip off the extra chain.
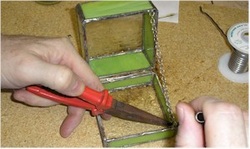
Hold the chain into the corner of the lid
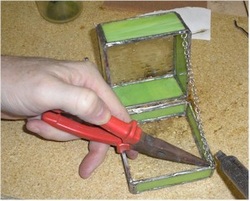
The solder should be on the inside of the box.
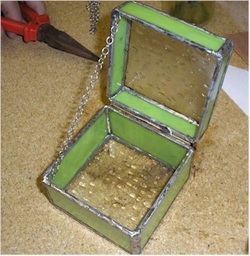
Then test the box to insure that the hinge works and that the lid closes properly.
For the video instructions on this project and the other pdf pattern's that come with the video, go to our video section on this site (click here). To purchase jewel boxes, visit our Etsy Store (click here).


