

|
Glass Tips & TricksNewsletters from our past converted to fresh articles about stained glass.
|

|
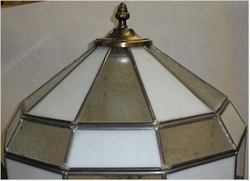
Repair A Cheap Lamp Shade
There are lamp shades out there that are lower quality than others. The best lamp shades are built using the copper foil technique that Louis Comfort championed. They are strong and sturdy.
Those made with extruded lead came are cheaper to make, but they don't hold up over time, especially if they haven't been cemented, which is the case with most of them. You see these around because they are less expensive to build.....They break easily.
Those made with extruded lead came are cheaper to make, but they don't hold up over time, especially if they haven't been cemented, which is the case with most of them. You see these around because they are less expensive to build.....They break easily.
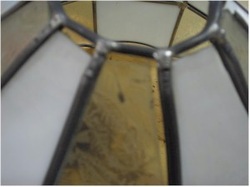
You can see how the lead has pulled away from the glass because it stretched and because it broke.
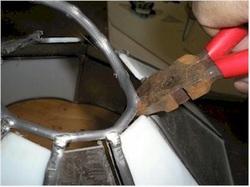
First, I clipped off all the lead on top to begin the repair.
Looking down, you can see how the lead is bent and separated from the glass. The whole structure wants to collapse.
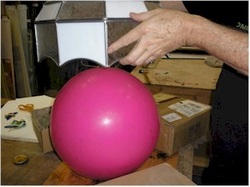
I placed the shade over a child's ball that is the right size. There are heavy boxes on each side to keep it from rolling too much.
I push the lamp down on the ball slightly to get all of the glass back to the round shape we want.
I push the lamp down on the ball slightly to get all of the glass back to the round shape we want.
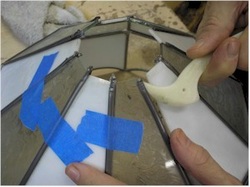
Then I began to get the pieces of glass back in the lead came. I used a fid to open the came in damaged spots. Sometimes I had to put the ball back to get my shape again. Each time I got the glass and lead back together, I used painters tape to hold them.
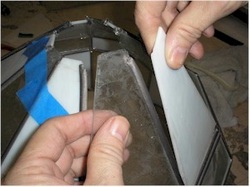
It took patience and care to wiggle out the broken piece of glass, I had to bend nearby pieces up so there would be more room to remove the piece.
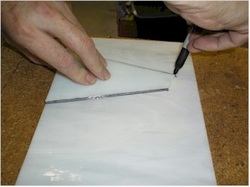
I used the old piece as a pattern for cutting the new one. Then I put it back in place, shifting and working it back into the lead came.
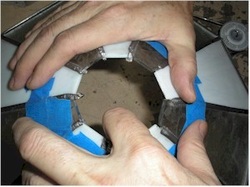
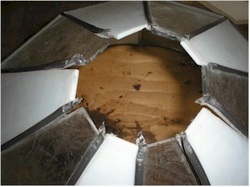
Once the shade had all the pieces back into the came, I pressed firmly to get a perfectly round hole.
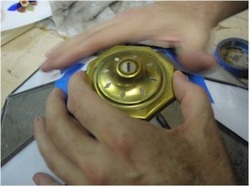
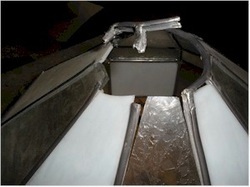
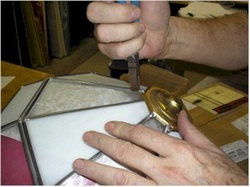
Then I place a proper heat cap over the hole. There would have been one if this had been a higher end lamp.
I tacked it in two spots to keep it from moving around. I was careful to get the cap centered so that it would hang level when placed on the lamp.
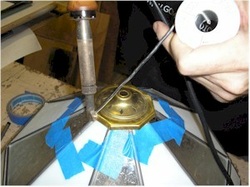
I put paper on the ball so hot solder wouldn't hurt it.
As I soldered the lead lines back onto the cap, I sometimes used pliers to straighten them.
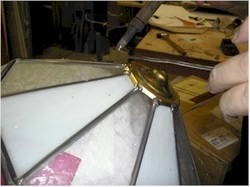
Then I tacked them in place. Once they were all tacked, I test hung the shade to make sure it balanced. If it had been slightly off, I would have tacked weights to the shade to get it balanced the way they do in a tire shop.
I added flux to the interior and soldered each line up to the cap.
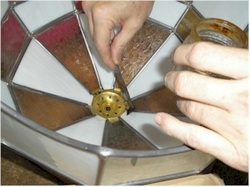
I cleaned the shade and placed it on the lamp.
Then I screwed the decorative top and nut onto the assembly. The heat shield is covered and the shade fits snuggly onto the base.
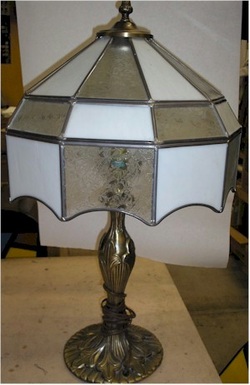
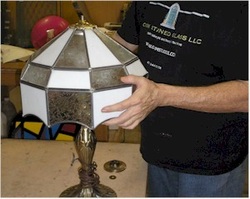
The repaired shade is stronger than it was originally.
I did this as a favor, I'm glad I don't have to make my living repairing broken glass! But, there is a feeling of satisfaction when the job is complete. And the owner is always happy to get the piece back.
I did this as a favor, I'm glad I don't have to make my living repairing broken glass! But, there is a feeling of satisfaction when the job is complete. And the owner is always happy to get the piece back.