Gomm Studios   (385) 392-7989
Gomm Stained Glass
  • Home
  • Projects
  • Classes
    • Learn More About Studio Classes
  • STORE & RESOURCES
    • Art 4 Sale
    • Amazon Shop
    • Etsy
    • Tips Articles >
      • Fixing Windows >
        • Repairing Severe Damage
        • Repairing A Broken Piece Of Glass
        • Fixing A Small Break In A Big Piece Of Glass
        • Faking A Repair
        • Doing A MAJOR Repair
        • How To Repair A Leaded Panel
        • How To Repair Stained Glass That Has Separated
        • How To Rebuild A Leaded Glass Window W/ Copper Foil
        • How To Repair A Moderately Broken Art Glass Panel
        • How To Repair An Insulated Stained Glass Window
        • Changing the Border Glass In a Leaded Panel
        • Repairing A Stained Glass Panel For An Artist
        • Repair Using A Dremel Tool
        • Quick(er) Lead Repair
      • Tricks Of The Trade >
        • Insulating Glass So It Can Be Hung In A Door
        • Moving And Handling Glass
        • Cutting Diamonds On Very Rough Glass
        • How To Add Coining To A Panel For A Very "French" Look
        • How To Shorten A Stained Glass Panel
        • How To Trim And Cut A Stained Glass Panel That's Too Long
        • How To Build A Jig To Help Cut Bevels
        • How To Cut Stained Glass Without A Pattern
      • Reinforcing and Framing Glass >
        • Reinforcing A Large Panel
        • How To Aggressively Reinforce A Window
        • Soldering A Zinc Edge On A Panel
        • How To Solder A Reinforcing Edge On A Curved Panel
        • How To Put Metal Around An Octagon Shaped Panel
        • Building A Frame For Stained Glass Shutters
      • Shipping Stained Glass >
        • How To Ship Big Stained Glass Panels
        • How To Build A Solid Shipping Crate
        • How We Crate Same Size Multiples of Glass
        • How To Build A "Double Foam" Crate
        • Loading Glass On A Trailer
      • Lighting Projects >
        • Installing Art Glass In A Pool Table Lamp
        • How To Build A Panel For A Backlit Space
        • How To Reinforce A Stained Glass Skylight
        • Creating A False Skylight
        • Building A Four Sided Lamp
        • Repair A Cheap Lamp Shade
        • Building A Stained Glass Lamp With A Worden Mold
      • Installing Stained Glass >
        • How To Install Stained Glass in an Existing Window Frame
        • How To Install Stained Glass In A Cabinet Door
        • How To Hang A Stained Glass Window
        • How We Install A Panel In An Arched Window Opening
        • What Ttype Of Caulk To Use
      • Sandblasting Stained Glass >
        • How To Sandblast Stained Glass
        • How We Sand Carve A Stained Glass Transom
        • Setting Up A Sandblast System
        • How To Sand Carve A Rose In Glass
      • Organizing Your Studio >
        • Build Your Own Work Bench
        • Chemicals We Use In Our Studio
        • Getting A New Glass Order
        • Build Your Own Stained Glass Rack
        • Converting To A Lead Free Studio
      • Bring New Life To Windows >
        • Removing Corrosion From Stained Glass
        • Re-Apply Patina To Stained Glass
        • How To Clean A Really Dirty Window
        • Clean And Apply Patina To Stained Glass
        • Cleaning And Adding Patina To A New Stained Glass Panel (revisited)
        • Easily Clean Corrosion Off Of Stained Glass
      • Unusual Projects >
        • Building A Stained Glass Globe
        • The Painted Leaf Project
        • How To Paint A Face On Stained Glass
        • Fusing A Stained Glass Necklace
        • Building A Stained Glass Picture Frame
        • Building A Stained Glass Jewelry Box
        • Make Stained Glass Charms
        • Repairing A Stained Glass Angel By Making Our Own Glass
      • Soldering Techniques >
        • Fix or Reinforce Glass With A Solder Bridge
        • How To Solder For A Stained Glass Repair
        • Reclaiming Old Flux Core Solder For Use In Stained Glass
        • Soldering Technique-Fixing A Foil Problem
      • Basic Skills >
        • How To Cut Stained Glass
        • How To Cut Stained Glass with a T-square Cutter
        • How To Cut A Tight Curve In Stained Glass
        • Cutting Very Thin, Irregular Stained Glass Pieces
        • Cut Glass Using A Straight Edge
      • Advanced Craftsmanship Skills >
        • Cut Glass Using A Taurus Ring Saw
        • Drill Holes In Stained Glass With Diamond Drillbit
        • Drill Holes In Stained Glass With A Grinder
      • Business Tips >
        • Marketing Stained Glass
        • Helping Your Stained Glass Business (And Yourself) Survive With Style
        • Mistakes Happen To Us All (And Then We Fix Them)
        • Converting To A Lead Free Studio
    • YouTube Videos
    • Free Patterns
  • About Us
    • Instagram
    • Shows And Galleries
    • History Of Our Studio
    • Articles About Us
    • Links
    • Contact Us
Picture

Glass Tips & Tricks 

Newsletters from our past converted to fresh articles about stained glass.
Picture

Fixing A Small Break In A Big Piece Of Glass
​

Click Here For The YouTube Video of this article

Picture
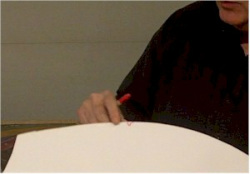
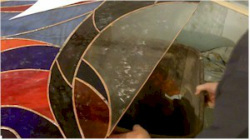
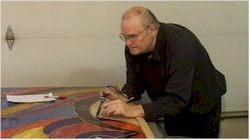
Here's the pattern for the piece of glass I need to replace. You can see it's got a very small chip in it, just a crack that went down and came right back up. I put foil on the broken glass and soldered over it. It looked fine until Jeanne cleaned the glass and then it stuck out like a sore thumb, there was no way to cover it up, so we have to replace it.

"The difference between a professional and an amateur is that a professional will fix their mistakes" -David Gomm


Picture
I drew a line on the glass to show a method I considered, just placing foil on the curve of the red mark and making a false lead line. This would have been okay, but it would have diminished the look of the big panel. I did an article about that type of repair and you can view it by clicking here.


Picture
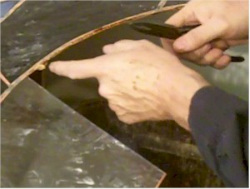
I start by scoring the piece of glass many times, cutting it in strips about 1" wide. When I finish cutting in one direction, I go in the opposite direction. I make sure to get a score right into the corner so I can remove that glass easily. 


Picture
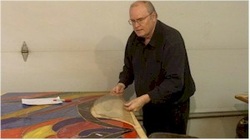
I then need to slide the glass out so that I can break it loose. As I do so, I find that the end of the panel is wobbly, so I slide a stick under the panel to provide extra support.  The stick spans from the worktable to the saw table.


Picture
I place a trash can below the window.

Picture
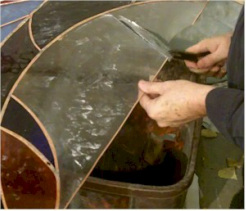
Then I can begin breaking out the pieces of glass.

Picture
When I get to where I tried to patch the break in the glass, it's pretty easy to see.

Picture
I continue to break out the pieces of unwanted glass.

Picture
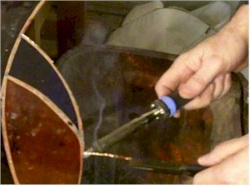
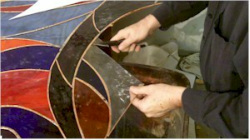
Then I take a hot iron and melt the solder. I hold the foil, that was holding the old piece of glass in, gently and pull it as it's released.

Picture
With the foil removed, I run the iron under the edge of the glass to get rid of any "icicles" that might catch as I slide the panel back onto the bench. 
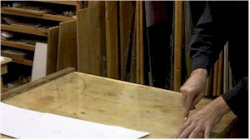
 I remove the stick that has been holding the end of the panel while I support the panel and slide the stained glass onto the work table.


Picture
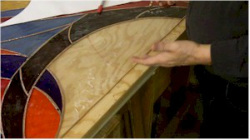
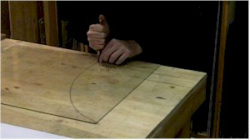
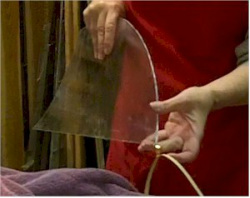
The replacement piece of glass takes up a good portion of a full sheet. I trace it out and then score and break off the extra glass.

Picture
I then cut it out like any normal piece of glass, using a hand cutter and our orange glass cutting oil.

Picture
Then Jeanne grinds the rough edges off of the glass so she won't get cut.

Picture
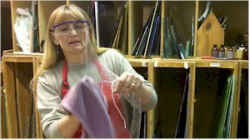
She then dries the glass off with a towel.

Picture
And she foils the glass with 1/4" copper foil.

Picture
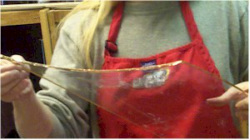
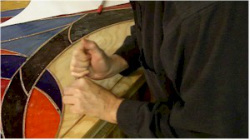
She goes all around the piece, pinching and holding the foil in place.

Picture
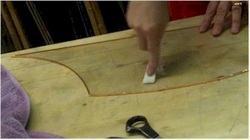
Then she uses a fid to burnish the foil tightly to the glass.

Picture
I can now place two pieces of scrap glass onto the work table to hold the replacement piece to the correct height.

Picture
I set it in place and check that the edge lines up with the other glass.

Picture
Since the nails and pattern are removed, I use the 
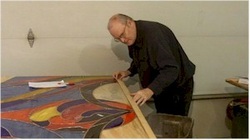
stick I used earlier as a straight edge to insure that the glass is flat along the bottom of the panel.

Picture
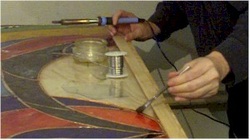
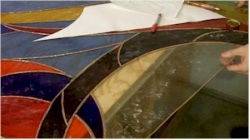
I apply flux to several spots along the replacement piece.

Picture
And I solder the joints to hold the replacement piece in place.

Picture
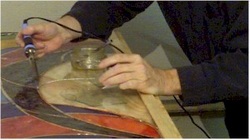
I then completely solder the repair in place. Later I'll turn the panel over and solder the backside.

Home

​
Stained Glass Books
​

Stained Glass Videos

​Links Page

Stained Glass
Art Therapy

​Studio Classes

OnLine Classes

​Portfolio

​Etsy Patterns

​UCAB Sourcebook

Build Your Own Table

​Kaleidoscope


Tips & Articles

Patterns
Mosaic Patterns

​Contact Us

Art For Sale

​Free Videos

Creativity Quotes
​

Date Night
​
​
History Of Our Studio

​Articles About Us

​Shows And Galleries

​Join Our Email List

5 Ways To Thrive
​​

Copyright © 2016-2024